Throwing a cylinder is the exercise that teaches you almost everything else about the wheel. Mugs, vases, jars and even bowls start as a cylinder, so if you can pull a straight, even wall, the rest of your pottery gets easier.
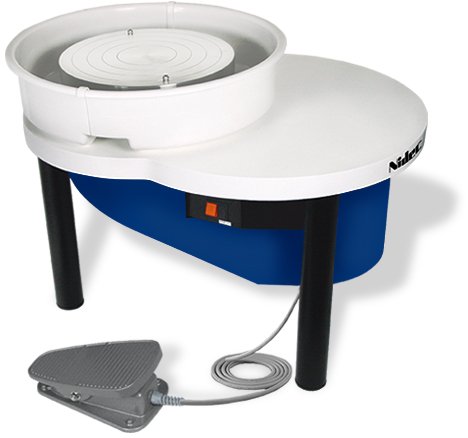
Table of Contents
Quick Answer
Throwing a cylinder takes seven steps: wedge and center the clay, open it, set the floor, compress the base, pull the walls up in three passes, refine the rim, and cut the piece off the wheel. Keep your hands wet, your elbows braced and the wheel pace slow enough for you to feel the clay.
When you finish, cut the cylinder in half from top to bottom. The cross-section shows exactly how even your walls are.
Why Throwing a Cylinder Comes First
Throwing a cylinder forces you to practice every basic wheel skill in one small piece. You need to center, open, compress, pull and finish, and each of those steps shows its mistakes quickly. A lopsided base, a thick bottom or a rim that wanders will all be obvious in a plain straight form.
That is why many classes spend weeks on throwing a cylinder before moving on to shapes. If you are still deciding between wheel work and other methods, our article on wheel throwing vs hand building can help you choose.
Tools and Setup for Throwing a Cylinder
You do not need a large tool kit. Gather these before you sit down:
- A pound or so of well-wedged clay for your first attempts, which is a manageable amount.
- A bucket of clean water and a sponge.
- A needle tool and a wooden or metal rib.
- A cut-off wire and a chamois or small sponge on a stick for the rim.
- A wheel head or bat that is clean and dry.
Bats make it easy to lift finished cylinders without distorting them. See our guide to choosing pottery wheel bats if you are not sure what to buy. Make sure your clay has been properly prepared as well, since air pockets and lumps ruin a cylinder before it begins. A decent wedging table helps a lot.
Throwing a Cylinder Step by Step
Step 1: Wedge and Center the Clay
Wedge your clay until it is smooth and free of air, then slap it onto the center of the wheel head. Wet your hands and center the clay at a fast pace, bracing your arms against your body. The mound should feel still under your palms, with no wobble. If centering is giving you trouble, read our full guide on how to center clay on a pottery wheel.
Step 2: Open the Clay
Slow the wheel slightly. Press your thumbs straight down into the middle of the mound, stopping when you are about a half inch, or roughly a centimeter, from the wheel head. A needle tool lets you check the depth, which saves you from punching through the floor.
Step 3: Set the Floor Width
Draw your fingers outward along the floor to widen the opening to the width you want. Keep the floor flat and the thickness even. This is the footprint of your cylinder, so decide the diameter now, since it is difficult to change later.
Step 4: Compress the Base
Press the floor firmly with your fingers or a rib while the wheel turns. Compressing aligns clay particles and helps prevent S-shaped cracks that appear when a base dries unevenly. Do not skip it, even on a small piece. Compress, then smooth, and remove any pooled water from the center with a sponge.
Step 5: Pull the Walls
Now comes the main work of throwing a cylinder. Place one hand inside and one outside the clay at the base, press lightly together and lift smoothly, keeping the pressure steady and the wheel at a calm pace. Aim for three pulls: the first brings up the wall, the second thins it, and the third refines it.
Slow down a little with each pass, and finish each pull by easing off gradually. Tilt the sponge, not your fingers, if the surface gets dry or drags. Add water as needed, but not so much that the clay becomes mushy.
Step 6: Refine the Rim
The rim is the weakest part of a cylinder, so give it care. Trim off any uneven top with a needle tool, then smooth the edge with a chamois or sponge so it is rounded and even. Compress the lip gently with your fingers to strengthen it.
Step 7: Cut and Lift Off
Sponge out the water from inside, then run a damp sponge around the base to remove slurry. Cut under the cylinder with a wire while the wheel turns slowly. Lift the bat or the pot with both hands, keeping your fingers under the base and away from the walls.
Check Your Work After Throwing a Cylinder
The best feedback after throwing a cylinder is a cut cylinder. Once it is firm enough to hold its shape, slice it from rim to base with a wire and look at the profile. You will see right away where it is thick or thin, whether the floor is sound, and whether the rim is balanced.
Many potters keep their cut cylinders as a record. Label them with the date, so you can see how your walls improve over weeks.
Troubleshooting Table for Throwing a Cylinder
| Problem | Likely cause | Fix |
|---|---|---|
| Thick, heavy base | Not enough compressing or trimming | Compress the floor, and pull more clay up from the base |
| Wall twists | Wheel too fast or hands moving too quickly | Slow down and lift with steady pressure |
| Wall wobbles | Clay not centered | Re-center before opening |
| Wall collapses | Too much water or walls too thin | Use less water and thin the wall more gradually |
| Wavy rim | Uneven pulling pressure | Trim the rim and rebuild with a steadier pull |
| Crack in the base after drying | Poor compression, uneven drying | Compress the floor and dry slowly under loose plastic |
Common Mistakes When Throwing a Cylinder
- Starting with too much clay for your skill level.
- Rushing the centering step.
- Using too much water, which turns the clay to slop.
- Pulling at a speed your hands cannot follow. Our article on pottery wheel speed settings explains how to adjust.
- Leaving a thick bottom that makes the pot heavy and prone to cracking.
A Practice Plan for Throwing a Cylinder
Repetition builds muscle memory when you are throwing a cylinder. Try this simple plan across several sessions:
- Throw five cylinders from the same weight of clay.
- Cut each in half and compare the wall thickness.
- Pick the best one and try to match its profile.
- Then change one variable, such as wall height or width, and repeat.
Keep your notes simple: clay weight, wheel pace, and what you would change next time. You will see steady improvement without needing a new technique.
Posture and Hand Position for Throwing a Cylinder
Good posture saves clay and frustration. Sit square to the wheel with your feet planted, lean slightly over the clay and lock your elbows against your hips or thighs. Your body becomes the frame that holds your hands steady while the clay moves.
When throwing a cylinder, keep your wrists straight and your fingertips relaxed. Squeezing too hard transfers tension into the clay and often causes twisting. Think of the walls as something you guide upward, not something you force.
Trimming and Drying After Throwing a Cylinder
A freshly thrown cylinder is soft and fragile. Let it stiffen to leather-hard before you handle it much. Cover it loosely with plastic if the room is dry, because drying too fast can crack the base or warp the rim.
At leather-hard, center the cylinder upside down on the wheel and trim the foot ring and excess weight from the bottom. Check that the base is not too thin before cutting more. Then dry the piece slowly and evenly, away from drafts and heaters, before the bisque firing. Our firing guides explain what happens next.
Cylinder Variations Once You Know the Basics
Once throwing a cylinder feels automatic, you can adapt the same steps to new forms. Make the walls taller and narrower for a vase, add a handle for a mug, or collar the top to make a bottle. Add a gallery rim or a flange and you have the start of a lidded jar.
The same pulling and compressing skills apply to all of them. Beginners often rush ahead to complicated shapes, but the potters whose work looks calm and confident are usually the ones who kept practicing the plain cylinder.
Equipment That Makes Throwing a Cylinder Easier
A reliable wheel makes throwing a cylinder more productive. Look for steady speed control, a quiet motor and a sturdy splash pan. If you work at home, our article on a pottery wheel for a home studio covers the details. You can also browse our pottery wheels, including the Shimpo VL-Lite.
Follow the manufacturer’s manual for setup, and have a licensed electrician handle any wiring. Keep long hair and loose clothing away from the wheel head. For further reading on clay behavior and ceramic materials, Digitalfire offers a deep technical reference.
Frequently Asked Questions About Throwing a Cylinder
How much clay should I use for throwing a cylinder?
About a pound is a good starting amount for a small cylinder. Larger pieces need more clay and a wheel with the power to turn it.
How thick should the walls be when throwing a cylinder?
For a first cylinder, aim for walls around a quarter inch, or about six millimeters, with a floor a bit thicker. The ideal depends on the pot, and trimming will remove some thickness from the base later.
Why does my cylinder always flare out at the top?
The top is thinner and softer, and pressure from your fingers tends to push it outward. Compress the rim, collar the top gently with your hands, and slow down on the last pull.
How long does it take to master throwing a cylinder?
It varies. Many students feel comfortable after several weeks of regular practice, but progress depends on how often you throw and how carefully you review your work.
Final Thoughts
Throwing a cylinder is the skill that pays off in every pot you make afterward. Center well, set a compressed base, pull in three steady passes, and cut every practice piece in half to learn from it.
If you are setting up a studio, see our pottery wheels or contact us and we will help you find a wheel that suits the way you work.
