A kiln element resistance test can tell you something that a visual inspection cannot: whether the heating elements are electrically within the expected resistance range for your kiln.
That matters because kiln elements gradually change as they age.
They can become higher in resistance, develop breaks, suffer connection problems, or behave abnormally even when they still look intact.
If your kiln is taking longer to reach temperature, struggling to reach its normal firing range, or producing unusual firing results, testing the elements can help determine whether they are part of the problem.
The important point is that there is no universal “good” resistance number for every kiln.
The correct reading depends on the kiln model, voltage, phase, element configuration, and whether you are measuring an individual element or an entire section.
So the correct kiln element resistance test is not:
“Does my multimeter show a certain number?”
It is:
“Does my measured resistance match the manufacturer’s specification for this exact kiln configuration?”
That distinction prevents a lot of bad troubleshooting.
What Is a Kiln Element Resistance Test?
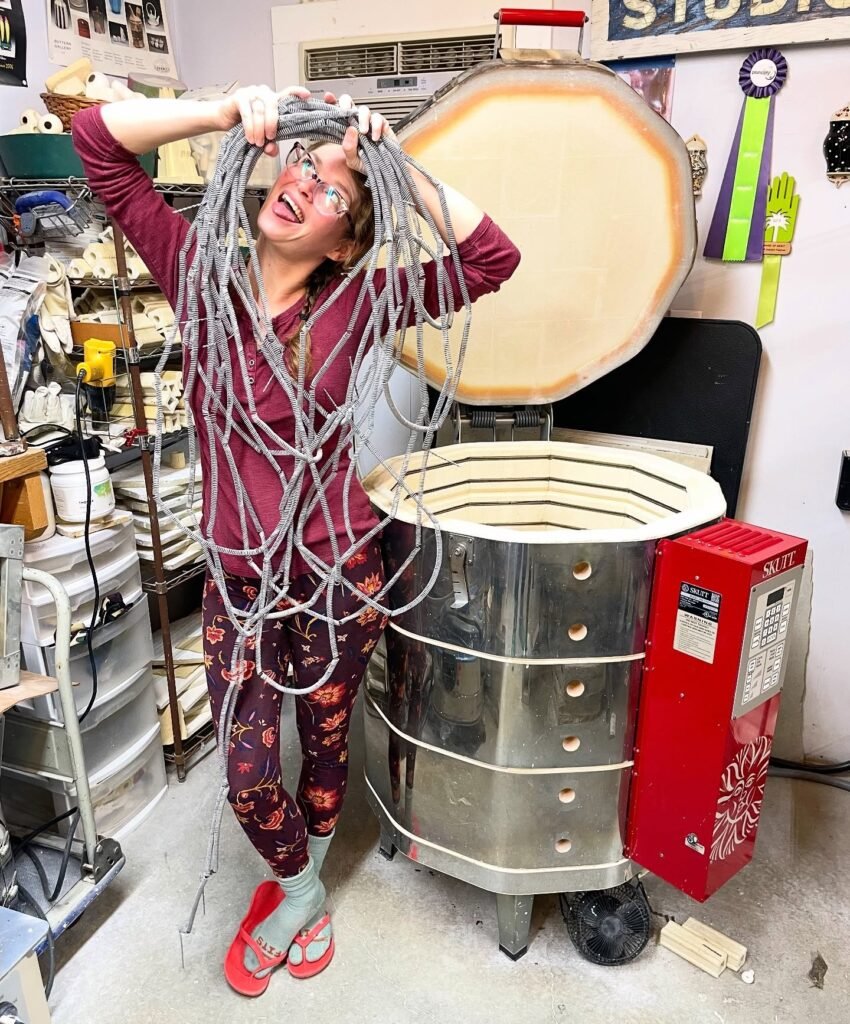
A kiln element resistance test uses an ohmmeter or multimeter to measure electrical resistance through a kiln’s heating element circuit.
Resistance is measured in ohms, represented by the symbol Ω.
A heating element is essentially a resistive electrical conductor.
When electrical current passes through it, the resistance causes electrical energy to be converted into heat.
As the element ages, its electrical resistance can change.
That change can affect how much power the kiln produces.
A resistance measurement therefore gives you another way to evaluate the condition of the heating system.
Skutt publishes model-specific element resistance information for its KilnMaster kilns and explains that these measurements can help identify worn or broken elements.
You can find the manufacturer’s current information through Skutt’s KilnMaster support resources.
Why Test Kiln Element Resistance?
There are several reasons a potter might perform a kiln element resistance test.
The most common is a change in firing performance.
For example, your kiln may normally reach its target temperature within a familiar period.
Then, gradually, firings begin taking longer.
You may notice that:
- The kiln takes longer to reach temperature
- The kiln struggles near the top of its firing range
- One section heats differently from another
- Firing times increase
- The kiln produces unexpected error messages
- Witness cones show less heatwork than expected
- One element appears not to heat
- A recently installed element behaves abnormally
- A used kiln performs below expectations
These symptoms do not automatically prove that the elements are worn.
A relay, thermocouple, electrical supply, controller, wiring connection, or loading problem can produce similar symptoms.
That is why resistance testing is useful as part of a broader diagnostic process.
What Does Resistance Mean in a Kiln?
Resistance describes how strongly a material opposes electrical current.
For a simplified electrical relationship:
Power = Voltage × Current
And according to Ohm’s law:
Voltage = Current × Resistance
That means changes in resistance can affect the current flowing through the heating circuit.
If an element’s resistance increases beyond its intended range, the kiln may produce less heating power under the same electrical conditions.
This is one reason an aging kiln can gradually take longer to reach temperature.
The change may not be dramatic enough to make the kiln immediately fail.
Instead, firing performance can deteriorate gradually.
There Is No Universal Kiln Element Ohm Reading
This is one of the most important things to understand before performing a kiln element resistance test.
Do not search for “normal kiln element ohms” and assume the first number you find applies to your kiln.
It does not.
Element resistance depends on factors including:
- Kiln model
- Voltage
- Phase
- Element design
- Number of elements
- Series or parallel configuration
- Whether you are measuring one element or a section
- Manufacturer specifications
For example, Skutt’s published resistance charts show different resistance values for different KilnMaster models and electrical configurations.
A KM-818 does not necessarily have the same resistance specifications as a KM-1027.
Even different versions of the same general kiln family can have different electrical specifications.
Always use the manufacturer’s data for your exact model.
Individual Element vs Element Section
Another common mistake is assuming that every resistance measurement represents one physical element.
That is not always true.
Some kiln designs measure an entire section containing multiple elements.
Skutt specifically notes that its KilnMaster resistance readings are, in many cases, the resistance of a kiln section rather than one individual element.
That distinction matters.
If you measure a section and compare the reading against the specification for a single element, you can draw the wrong conclusion.
Before starting a kiln element resistance test, identify exactly what your manufacturer’s resistance chart is describing.
Is it:
- One element?
- Two elements?
- A section?
- A series circuit?
- A parallel circuit?
The measurement only makes sense when you know what the number represents.
What You Need for a Kiln Element Resistance Test
For a basic resistance measurement, you need an appropriate multimeter or ohmmeter.
The meter needs to be capable of accurately measuring the relatively low resistance values found in kiln heating circuits.
You also need:
- The exact kiln model
- Voltage specification
- Phase specification
- Manufacturer resistance chart
- Access to the appropriate electrical connections
- A safe, de-energized kiln
The last item is critical.
Resistance measurements are performed with the kiln powered off and disconnected from electrical power.
Do not improvise around live electrical circuits.
If the test requires opening an electrical enclosure and you are not qualified to work inside that equipment, use a qualified kiln technician or electrician.
Safety Comes Before the Resistance Test
A kiln contains potentially hazardous electrical circuits.
Even after switching the kiln off, do not assume every internal component is safe to touch.
For a resistance measurement, the kiln must be disconnected from its electrical supply.
Do not perform resistance measurements on an energized kiln.
Do not open the control box while the kiln is connected to power unless the procedure specifically requires live testing and you are qualified to perform that work.
Skutt’s troubleshooting guidance explicitly warns that the kiln should be unplugged before opening the control box for resistance testing.
Their diagnostic resources also distinguish resistance testing from live voltage and amperage measurements, which may require an experienced technician or electrician.
See Skutt’s diagnostic testing guidance for the manufacturer’s distinction between these tests.
How to Perform a Basic Kiln Element Resistance Test
The exact procedure depends on your kiln.
Do not assume the procedure for one model applies to another.
But the general process is:
1. Identify the kiln model
Find the model and electrical information on the kiln’s rating plate.
Record:
- Model
- Voltage
- Phase
- Any relevant electrical specifications
2. Obtain the manufacturer’s resistance specification
Find the appropriate resistance chart or service documentation for that exact kiln.
3. Disconnect electrical power
Unplug the kiln or otherwise disconnect it from its electrical supply according to the manufacturer’s service procedure.
Do not continue while the kiln is energized.
4. Set the meter to resistance
Select the appropriate Ω range.
For low-resistance circuits, the meter needs to be capable of accurately reading the expected range.
5. Check the meter leads
Touch the probes together.
Depending on the meter, you may see a small resistance caused by the leads themselves.
Some meters allow you to zero this out.
6. Access the correct test points
Use the manufacturer’s procedure for your kiln.
Do not randomly probe terminals.
7. Take the resistance measurement
Place the meter probes across the appropriate circuit points.
8. Record the reading
Write down the result.
9. Compare it with the manufacturer’s specification
Do not compare it with a generic internet value.
10. Interpret the result in context
A reading outside the expected range can indicate a worn or damaged element, but it can also point to a connection or configuration issue.
The test is diagnostic information, not a license to replace parts blindly.
Why the Meter Lead Resistance Matters
Kiln element resistance can be relatively low.
That means the resistance of your meter leads can become significant.
For example, if your meter and leads together show a small resistance when the probes touch, that resistance is included in the measurement.
For higher-resistance circuits, the difference may be relatively unimportant.
For low-resistance kiln element circuits, it can matter.
Skutt’s older service documentation specifically discusses zeroing or accounting for meter lead resistance when making low-ohm measurements.
The practical lesson is simple:
Know what your meter is actually measuring before interpreting the number.
What Does Infinite Resistance Mean?
An open circuit typically appears as infinite resistance or an overload/open indication on the meter.
If a heating element is physically broken, there is no continuous electrical path through that element.
That can produce an open-circuit reading.
This is strong evidence of a broken circuit.
However, you still need to understand what you are measuring.
If the kiln uses a parallel arrangement, measuring at a section may still produce a resistance reading through another intact path.
That means the absence of an obvious infinite reading does not necessarily prove every individual element in the section is intact.
Circuit configuration matters.
What Does Very High Resistance Mean?
A resistance reading substantially above the manufacturer’s specification can indicate an aging element.
As elements wear, their resistance can increase.
Skutt’s service documentation states that worn elements can show increased resistance and recommends comparing measured values with the specifications for the particular kiln.
A high resistance reading can mean the element or section is no longer performing within the intended range.
But again, do not immediately conclude that the element itself is the only possible problem.
Check:
- Correct measurement points
- Correct model specification
- Meter accuracy
- Electrical configuration
- Connections
- Element condition
A bad connection can complicate diagnosis.
What Does Low Resistance Mean?
A low reading can mean several different things depending on where you measured.
It could indicate:
- A measurement across the wrong points
- Parallel electrical paths
- A wiring issue
- A short or abnormal circuit condition
- A measurement that is actually normal for that kiln
Do not assume “lower is better.”
Kiln elements are designed for a specific electrical resistance.
The goal is not minimum resistance.
The goal is the correct resistance for the designed circuit.
Why a Good-Looking Element Can Still Be Bad
Visual inspection is useful, but it is not enough.
An element can appear intact and still have electrical characteristics outside its intended range.
Likewise, an element can show obvious physical damage and have an electrical problem.
Look for:
- Broken sections
- Severe sagging
- Collapsing coils
- Contamination
- Unusual thinning
- Loose connections
- Burned connection points
- Sections that do not glow
But combine visual inspection with electrical measurements where appropriate.
Skutt’s service resources use both visual and electrical diagnostics when troubleshooting kiln performance.
Visual Inspection vs Resistance Testing
These two methods answer different questions.
Visual inspection asks:
“Does the element look physically damaged?”
Resistance testing asks:
“Does the electrical resistance match the expected specification?”
Firing observation asks:
“Does the kiln actually heat as expected?”
Witness cones ask:
“What heatwork did the kiln deliver?”
The strongest diagnosis comes from combining the evidence.
For example:
Visual: One element appears intact.
Resistance: Reading is substantially above specification.
Firing: Kiln takes longer to reach temperature.
Cones: Target cones are underfired.
That combination makes an element problem much more plausible.
Kiln Element Resistance Test for a Slow-Firing Kiln
A kiln that suddenly takes longer to reach temperature deserves investigation.
Do not automatically change your firing schedule.
Start by asking whether the kiln itself has changed.
Compare:
Previous firing
8 hours
Current firing
10 hours
If the load and firing program are comparable, investigate.
Potential causes include:
- Aging elements
- Low supply voltage
- Broken element
- Bad relay
- Poor electrical connection
- Different loading pattern
- Thermocouple problems
- Controller problems
A kiln element resistance test can help determine whether element wear is contributing.
Skutt’s diagnostic guidance also notes that low voltage can cause a kiln to struggle to reach temperature.
That means resistance testing should be part of a broader diagnosis rather than the only test.
Resistance Testing and Kiln Amperage
Resistance and amperage are related, but they are not interchangeable.
A resistance measurement is normally taken with the kiln de-energized.
Amperage measurement is taken while the circuit is operating.
Amperage can therefore provide information about how the kiln behaves under load.
Skutt’s diagnostic guidance explains that low amperage can result from low voltage, increased element resistance, wiring issues, or other problems.
This gives you another useful diagnostic pathway.
If resistance measurements suggest the elements are healthy but operating amperage is unexpectedly low, investigate voltage and electrical connections rather than automatically replacing the elements.
Live electrical measurements should be handled by qualified personnel where required.
Kiln Element Resistance Test vs Amperage Test
These tests answer different questions.
| Test | Kiln State | What It Tells You |
|---|---|---|
| Resistance | Power disconnected | Electrical resistance of the element circuit |
| Amperage | Powered and operating | Current being drawn under load |
| Voltage | Powered and operating | Electrical supply to the kiln |
| Visual inspection | Depends on procedure | Physical condition and heating behavior |
| Witness cones | During firing | Heatwork delivered to the chamber |
A technician may use several of these tests together.
That is much more reliable than diagnosing the entire kiln from one measurement.
How Resistance Changes as Elements Age
Kiln elements operate under repeated thermal stress.
Every firing takes the element from relatively cool conditions to very high temperatures and back again.
Over many cycles, the element material changes.
One consequence can be increased electrical resistance.
As resistance increases, the kiln can produce less heating power under the same electrical conditions.
The result may be gradual.
You may not wake up one morning to a completely dead kiln.
Instead, you may notice:
- Slightly longer firings
- Increasingly long high-temperature stages
- Difficulty reaching the upper end of the kiln’s range
- More frequent controller errors
- Increasingly underfired cones
- Uneven heating
That is why keeping firing records is useful.
A gradual change is much easier to recognize when you know what the kiln normally does.
Can One Broken Element Affect an Entire Section?
Yes, depending on the kiln’s electrical design.
Some kilns use series arrangements.
Others use parallel arrangements.
In a series circuit, a broken element can interrupt the electrical path through the circuit.
In a parallel circuit, another path may remain available.
This is why resistance readings must be interpreted according to the kiln’s circuit configuration.
Skutt’s technical documentation specifically explains that parallel configurations can produce readings that do not directly represent the condition of each individual element.
That is another reason not to apply a generic testing method to every kiln.
Kiln Element Resistance Test on a Skutt Kiln
Skutt publishes model-specific resistance information for its KilnMaster and KilnSitter families.
For KilnMaster models, the manufacturer provides resistance specifications by model, voltage, and phase.
The values differ substantially between models.
For example, the published specifications show different resistance values for the KM-818, KM-1027, KM-1227, and other models.
That means you should identify the exact kiln before interpreting the measurement.
The Skutt KilnMaster resistance resources are the appropriate starting point for owners of those kilns.
Kiln Element Resistance Test on a KilnSitter Kiln
Older manual kilns with KilnSitter controls may use a different testing procedure.
Skutt provides specific instructions for measuring resistance through the power cord on certain KilnSitter kilns.
That procedure should not simply be copied onto a different kiln design.
Older kilns can also have different wiring arrangements and components from newer programmable models.
If you own an older kiln and do not have the correct technical documentation, obtaining the model-specific manual or using a qualified technician is the safer route.
How Much Resistance Is Too Much?
There is no universal threshold.
This is where many online kiln repair articles become misleading.
You might find someone saying that an element is bad if the resistance increases by a particular number of ohms.
That number may apply to one kiln model or one manufacturer’s testing procedure.
It does not automatically apply to every kiln.
For example, Skutt’s published service information has model-specific thresholds and specifications.
Some documentation describes worn elements as those measuring above the manufacturer’s recommended resistance by a specified amount or percentage.
The correct threshold is therefore the one provided for your kiln.
Always compare your measurement with the manufacturer’s specification.
What If Your Reading Is Slightly Above Specification?
Do not immediately replace every element.
First confirm:
- The meter is accurate.
- Lead resistance has been accounted for.
- The kiln is completely disconnected from power.
- You measured the correct points.
- You used the correct model specification.
- The circuit configuration is understood.
- The measurement is repeatable.
If the result remains outside the manufacturer’s acceptable range, then element replacement may be appropriate.
Should You Replace One Element or All of Them?
That depends on the kiln and the condition of the elements.
If one element is broken because of accidental physical damage and the remaining elements are relatively new, replacing only the damaged element may make sense.
If the entire set is significantly aged and multiple elements are showing increased resistance, replacing the complete set can provide more consistent performance.
Element position also matters.
Some kiln models use different element specifications in different sections.
Skutt notes that balanced kiln designs can use several types of elements in different positions.
Therefore:
Do not order a generic “set of kiln elements” without verifying the exact parts for your kiln.
Use the manufacturer’s model-specific parts information.
Why Element Position Matters
Heating elements are not necessarily identical throughout the kiln.
Manufacturers may use different resistance or power characteristics in different sections to compensate for heat loss.
For example, the top and bottom areas can lose heat differently from the middle.
The element design can therefore be intentionally balanced.
Replacing an element with a physically similar but electrically incorrect part can alter the kiln’s performance.
This is one reason Skutt warns that the correct element specifications are critical and that elements can vary between models and positions.
See Skutt’s element replacement guidance before ordering replacement elements for a Skutt kiln.
Resistance Testing Before Buying a Used Kiln
A kiln element resistance test can be particularly useful when evaluating used equipment.
A used kiln can look excellent externally while having heavily worn heating elements.
If the seller allows appropriate testing, resistance measurements can provide useful evidence about element condition.
Combine that with:
- Kiln model verification
- Voltage verification
- Element inspection
- Brick inspection
- Controller inspection
- Relay inspection
- Firing test
- Witness cones
- Firing time
- Electrical history
Do not rely on resistance readings alone.
But they can help prevent you from buying a kiln with expensive element work waiting for you.
The Kiln Depot’s used pottery kiln inspection guide covers the broader inspection process.
Resistance Testing After Replacing Elements
Testing can also be useful after element replacement.
The goal is to verify that the installed circuit is consistent with the manufacturer’s specifications.
But resistance is only one part of commissioning the repair.
You should also verify:
- Correct element positions
- Correct connections
- Proper element seating
- Correct wiring
- Appropriate firing behavior
- Witness cone results
A resistance reading that looks correct does not guarantee that the installation is perfect.
Likewise, a kiln that fires normally does not eliminate the need to inspect the repair.
Follow the manufacturer’s installation instructions.
Why Correct Element Connections Matter
The element itself is only one part of the circuit.
Connections carry the electrical current from the kiln wiring into the heating element.
A poor connection can create resistance at the connection point.
That can produce heat where you do not want it and reduce reliable power delivery to the element.
During maintenance, inspect connection points for signs of:
- Discoloration
- Corrosion
- Loose hardware
- Damaged connectors
- Overheating
- Burn marks
Electrical connections inside a kiln control system should be handled according to the manufacturer’s service instructions and by qualified personnel when appropriate.
Kiln Element Resistance Test and Relays
A bad relay can produce symptoms that look like an element problem.
Imagine one kiln section does not heat.
You measure the elements and find a normal resistance reading.
That does not mean the kiln is fine.
The relay may not be switching power to that section.
Skutt’s diagnostic guidance notes that a section drawing zero current can indicate a relay problem.
This is why a complete diagnosis might involve:
Resistance test → amperage test → visual inspection → relay diagnosis → firing test.
For more detail, see the Kiln Depot guide to kiln relay problems.
Kiln Element Resistance Test and Thermocouples
A thermocouple measures temperature.
It does not heat the kiln.
If the thermocouple is giving the controller incorrect information, the kiln can behave strangely even if the heating elements are healthy.
For example, a thermocouple problem can cause the controller to believe the kiln is hotter or cooler than it really is.
That can affect when power is applied to the elements.
So if the resistance readings are normal but the firing behavior remains abnormal, investigate the thermocouple as well.
The Kiln Depot’s kiln thermocouple guide covers common thermocouple problems and replacement considerations.
Can You Tell if an Element Is Bad by Looking at It?
Sometimes.
A completely broken element is usually obvious.
But visual inspection is not a complete diagnostic method.
Elements can become electrically worn before they look dramatically damaged.
They can also have connection problems that are not obvious from inside the firing chamber.
This is why a kiln element resistance test is useful.
It gives you electrical information rather than relying entirely on appearance.
Can You Test Kiln Elements Without a Multimeter?
A visual inspection can identify obvious failures.
You can also observe elements during an appropriate test firing procedure.
Skutt provides a visual diagnostic procedure in its service material where elements are observed as they heat.
A section that does not activate can suggest a relay problem.
An individual element that does not glow can suggest a broken element.
However, visual testing does not replace resistance measurement when precise electrical diagnosis is needed.
And live testing carries additional electrical hazards.
If you are not trained to perform live electrical work, do not improvise.
Why Resistance Testing Should Not Be the Only Test
A kiln element resistance test tells you about electrical resistance.
It does not tell you everything about kiln performance.
A complete troubleshooting process may need to consider:
Elements
Are they worn, broken, sagging, contaminated, or incorrectly installed?
Relays
Are they switching power correctly?
Thermocouples
Are they accurately reporting temperature?
Voltage
Is the kiln receiving the correct supply?
Amperage
Is the kiln drawing the expected current?
Controller
Is the firing program operating correctly?
Loading
Is the kiln loaded in a way that affects firing performance?
Witness cones
Is the kiln delivering the expected heatwork?
Looking at all these factors gives you a much better diagnosis.
A Practical Kiln Element Troubleshooting Sequence
If your kiln is firing slowly, use a structured approach.
Step 1: Check the firing history
Compare the current firing duration with previous firings.
Step 2: Check the firing program
Make sure the program has not changed.
Step 3: Inspect the elements
Look for breaks, severe sagging, contamination, or unusual damage.
Step 4: Check the resistance
Perform the appropriate kiln element resistance test with the kiln disconnected from power.
Step 5: Compare against factory specifications
Use the exact model, voltage, phase, and circuit configuration.
Step 6: Investigate relays
If the elements appear electrically normal, determine whether the relay is switching power correctly.
Step 7: Check the thermocouple
Make sure the temperature sensor is in good condition.
Step 8: Investigate electrical supply
Low voltage can reduce kiln performance.
Step 9: Test-fire if appropriate
Use witness cones to evaluate actual heatwork.
Step 10: Record the result
Keep the measurements for future comparison.
This creates a much more useful maintenance history than simply writing “kiln seems slow.”
Keep a Kiln Maintenance Record
If you own an expensive kiln, keep records.
Record:
- Date
- Kiln model
- Firing number
- Firing duration
- Target cone
- Resistance readings
- Amperage where available
- Voltage where appropriate
- Element replacement dates
- Relay replacement dates
- Thermocouple replacement dates
- Error codes
- Witness cone results
- Repairs performed
This gives you a baseline.
If the kiln gradually changes, you can identify the change before it becomes a major production problem.
Skutt’s own maintenance documentation includes sections for recording electrical readings, element resistance, relay information, firing data, and maintenance history.
When Should You Replace Kiln Elements?
Replacement should be based on condition and manufacturer guidance rather than an arbitrary calendar alone.
Some studios fire frequently.
Others fire only occasionally.
A kiln used several times a week experiences very different service conditions from one fired a few times a month.
Look at:
- Resistance
- Firing duration
- Physical condition
- Firing temperature
- Number of firing cycles
- Witness cone results
- Manufacturer recommendations
Skutt notes that element life varies according to firing conditions and provides maintenance guidance for its equipment.
Element Wear Can Be Gradual
This is why potters sometimes miss it.
The kiln still works.
The controller still turns on.
The elements still glow.
But the firing takes longer.
Then it takes even longer.
Eventually, the kiln may struggle to reach the desired cone.
That gradual decline is exactly where a kiln element resistance test becomes useful.
You can compare the electrical measurements with previous maintenance records and manufacturer specifications.
Instead of guessing whether the kiln is “getting old,” you have measurable information.
What About Elements That Sag?
Sagging can occur as elements age and operate at high temperatures.
Severe sagging can create problems if coils begin touching each other or moving toward areas where they should not be.
Skutt explains that element sagging and creep can become more significant at higher firing temperatures and with extended high-temperature holds.
If an element is physically collapsing onto itself, resistance measurements may not tell the whole story.
Physical inspection matters too.
Do not assume that an acceptable room-temperature resistance measurement means a physically damaged element is suitable for continued service.
What About Contaminated Elements?
Clay and glaze materials can contaminate heating elements.
That contamination can affect element performance and may contribute to premature failure.
Never treat the firing chamber as a place where loose glaze, clay dust, kiln wash, or other debris can accumulate indefinitely.
Regular kiln maintenance helps protect the elements.
Keep kiln shelves and firing surfaces clean.
Prevent glaze from contacting elements.
Remove debris appropriately.
And inspect the elements periodically.
How a Resistance Test Fits Into Routine Kiln Maintenance
You do not necessarily need to perform a kiln element resistance test before every firing.
That would be unnecessary for most studios.
The test becomes more useful when:
- Firing times change
- The kiln struggles to reach temperature
- A section stops heating
- You receive repeated firing errors
- Elements are visibly damaged
- You are replacing elements
- You are evaluating a used kiln
- You are investigating uneven firing
- You are performing scheduled maintenance
The goal is targeted diagnosis, not unnecessary testing.
The Difference Between Worn and Broken Elements
A broken element and a worn element are not necessarily the same problem.
A broken element can produce an open circuit.
A worn element may still conduct electricity but have resistance outside the manufacturer’s expected range.
That distinction matters because a kiln can continue functioning with worn elements for some time.
The problem may show up first as slower firing or difficulty reaching temperature.
Eventually, the kiln may no longer perform as intended.
What a Good Resistance Test Cannot Tell You
Even a perfect resistance measurement cannot tell you:
- Whether the kiln is firing evenly
- Whether the controller is calibrated correctly
- Whether the thermocouple is accurate
- Whether the kiln is receiving the correct voltage under load
- Whether the relay is switching properly
- Whether your glaze is being fired correctly
- Whether your kiln is loaded appropriately
Those questions require other forms of evidence.
This is why a resistance test should be viewed as one diagnostic tool in the larger kiln maintenance system.
Final Thoughts
A kiln element resistance test is one of the most useful electrical checks for diagnosing an aging or poorly performing electric pottery kiln.
The biggest mistake is looking for one universal resistance number.
There isn’t one.
The correct reading depends on the exact kiln, voltage, phase, element configuration, and measurement point.
Start with the manufacturer’s specifications.
Disconnect power before performing resistance measurements.
Use an appropriate meter.
Account for meter lead resistance when necessary.
Understand whether you are measuring an individual element or an entire section.
Then compare the result against the manufacturer’s data.
If the resistance is substantially outside specification, investigate the elements and their connections.
If resistance appears normal, keep going.
Check relays, thermocouples, voltage, amperage, controller behavior, loading, and witness cones.
That broader approach is what separates useful kiln troubleshooting from parts replacement by guesswork.
For routine maintenance, keep records of firing times and repairs so you can recognize gradual changes before they become major failures.
And when replacement is necessary, order the correct element for the exact kiln and position. Heating elements are not generic components simply because they look similar.
A well-maintained kiln should not require you to compensate for declining hardware with increasingly aggressive firing schedules.
When firing performance changes, diagnose the equipment.
The kiln element is one of the first places worth checking.
