Trimming pottery is the step that turns a thick, heavy thrown shape into a finished piece with a clean foot and a comfortable weight. If you have ever picked up a mug that felt like a brick, the missing step was almost certainly trimming pottery at the right moment with a sharp tool.
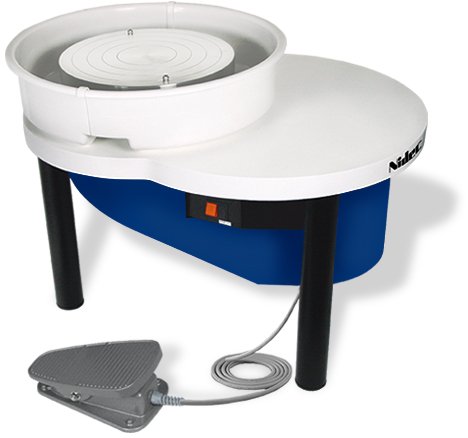
Table of Contents
Quick Answer
Trim when the clay is leather hard, meaning firm enough to hold its shape but still soft enough to carve with a loop tool. Center the pot upside down on the wheel, secure it, and remove clay from the base and lower walls in light passes. Cut a foot ring roughly one third of the pot’s width, keep the floor even, and stop before you thin it too far. Trimming pottery works best at a slow to medium wheel speed with a sharp tool.
Why Trimming Pottery Matters
A pot comes off the wheel with its weight sitting low, because that is where you left a generous base to survive cutting off and drying. Trimming pottery moves that weight where it belongs. It also gives the piece a defined foot, which lifts the bottom edge off the shelf and table so the pot sits level and looks finished.
There are practical reasons too. A trimmed foot lets a glazed piece sit on a kiln shelf without the glaze running onto it, as long as you keep the bottom clean. Even walls and an even floor dry and fire more evenly, which lowers the chance of cracks. Our guide to why pottery cracks covers how uneven thickness causes trouble during drying and firing.
Knowing When to Start Trimming Pottery
Timing is the part beginners miss most often when trimming pottery. If the clay is too wet, the tool drags, the wall flexes, and you leave messy tracks. If it is too dry, the surface chatters, dust flies, and the clay can chip or crack under pressure.
The leather-hard test
Before trimming pottery, press a fingertip into the base. It should leave a slight mark without sticking, and the clay should feel cool and slightly damp. A fingernail should be able to scratch a clean line. Most pieces reach this stage in a day or two of covered drying, though room temperature and humidity change this a lot.
Slowing or speeding up the stiffening
If a pot stiffens too slowly, loosen the plastic and let air reach it for an hour. If it is drying too fast, wrap it in plastic or mist it lightly and rest it for a few hours. A dedicated pottery drying cabinet gives you control over this when you throw many pieces at once.
Tools You Need for Trimming Pottery
You do not need a large kit for trimming pottery. A few good tools do nearly all the work, and a sharp edge matters more than the brand.
- A loop or ribbon trimming tool, with at least one round and one flat profile
- A needle tool for marking centers and checking floor thickness
- A soft rib for compressing and smoothing the foot
- A small sponge and a bowl of water
- Lumps of soft clay or a purpose-made chuck to hold the pot
- A bat or wheel head that is clean, flat and dry
Our separate write-up on the pottery trimming tool compares the tool types in detail. Here the focus is the method of trimming pottery, so we will keep the tool choices simple.
Setting Up Your Wheel for Trimming Pottery
Good trimming pottery starts before the first cut. The wheel needs to run smoothly at low speed and hold steady under pressure. A reliable studio wheel such as the Shimpo VL-Lite has the speed control that makes light trimming passes easier, and you can browse more options in our pottery wheel collection.
Use a bat or a clean wheel head
Many potters trim on a bat because it can be lifted away and cleaned between pieces. If you use pins, check that they sit firmly and the bat does not rock. Our guide to pottery wheel bats explains sizes and fitting.
Control the speed
Start with the wheel at a moderate speed while centering, then slow down for cutting. Too fast and the tool grabs, too slow and the surface looks ragged. Most potters settle on a speed where the shavings curl off cleanly.
9 Simple Steps to Trim a Foot Ring
These steps for trimming pottery work for bowls, mugs and plates. Adjust the depths for your own forms.
- Check the pot is leather hard and remove any burr on the rim with a damp sponge.
- Turn the pot upside down and set it roughly in the middle of the wheel head.
- Spin the wheel slowly and tap the pot until the rim runs true, then press it into place.
- Secure it with three small coils of clay around the rim, or use a chuck for a tall piece.
- Hold the tool still, rest your hand on the tool rest, and shave the excess from the lower wall.
- Remove clay from the base until the thickness looks even, checking with the needle tool.
- Cut the inside of the foot ring first, then clean the outside edge so the ring stands clearly.
- Smooth the foot with a soft rib or a slightly damp finger so there are no sharp edges.
- Sign the base, remove the pot gently, and let it dry slowly under loose plastic.
Where to place the foot ring
As a rule of thumb, aim for a foot ring about a third of the width of the pot. A wider ring suits plates, while a narrower one looks elegant on a small bowl. The height can be small. A foot only needs enough lift to show a shadow line.
Common Problems When Trimming Pottery
Most trouble when trimming pottery comes from timing, a dull edge, or an unstable pot. Here is a quick way to find the cause.
| Problem | Likely cause | Fix |
|---|---|---|
| Chatter marks | Clay too dry, dull tool, or loose pot | Mist the base, sharpen the tool, re-center the pot |
| Tool grabs and digs | Moving too fast or tool angle too steep | Slow the wheel and lower the angle |
| Hole through the floor | Trimmed too thin | Check with a needle tool before each pass |
| Pot slides off center | Weak coil attachment | Add firmer coils or use a chuck |
| Rough surface | Clay too wet | Wait until it is a little firmer |
Chatter marks when trimming pottery
Chatter looks like a ripple of tiny ridges. It usually appears when the tool is blunt or the clay has become too hard. Re-wet the surface lightly, sharpen the tool, and hold it with a firm, steady hand against the tool rest.
Wobble while trimming pottery
If the pot wobbles, stop the wheel and re-center rather than push on. A pot that runs slightly off will get an uneven foot, and the thin side can wear through before you notice.
How Much Clay to Remove When Trimming Pottery
There is no single number for trimming pottery, because the answer depends on the form and the clay body. Instead, use feel and sound. Tap the base lightly with a fingernail. A thick floor gives a dull thud, while an even wall gives a lighter ring. Also look at the cross section if you can, or hold the pot up to the light for an even glow.
When trimming pottery, do not remove everything you can. A floor that is too thin may sag, crack in the kiln, or leak. Leave enough thickness for the pot to carry its weight and its contents. Large pieces such as platters and big bowls need more floor than a small cup.
Trimming the walls and curves
On a bowl, shape the outer curve as you work down toward the foot. Follow the profile you threw rather than fighting it. Light, repeated passes give a smoother curve than one deep cut.
Trimming Pottery Without Losing the Style of Your Work
Trimming pottery does not have to mean a perfect machine-made look. Some potters leave visible tool marks as part of the surface. Others leave a slightly heavier base for a rustic look. What matters is that the base is deliberate. A foot with a sharp, glued-on look often chips in use, so ease the edge slightly with a damp sponge or finger.
Consider the glaze too. If you plan to dip the piece, leave a clean foot ring so you can wipe it dry before firing. Wax resist applied to the base protects the shelf and helps the pot stay put in the kiln.
Looking After Your Tools
Loop tools used for trimming pottery stay sharp longer when you keep them dry and apart from other metal. Wipe them after use and store them where the edges do not knock together. A tool with a rolled or nicked edge makes chatter worse, so sharpen or replace it when the cut starts to feel rough. For more reading on clay behaviour and tools, the reference library at Digitalfire is a useful resource.
Frequently Asked Questions About Trimming Pottery
Can I trim pottery when it is bone dry?
You can, but trimming pottery at that stage is not ideal. Bone-dry clay is fragile and produces fine dust, which is a health concern. Wear a suitable mask, work damp and clean up with a wet sponge instead of sweeping. It is much easier and safer to trim at leather hard.
Do I have to trim every pot I throw?
No. Many potters throw small items such as cups with a finished base and skip trimming. Larger or heavier forms, plates, and bowls almost always benefit from it. Trimming pottery is a choice you make based on the form and the look you want.
What speed should the wheel run for trimming pottery?
When trimming pottery, start slow to center the pot and then use a moderate speed for cutting. If the tool bounces or chatters, slow down. If the surface looks torn, you may be going too slow or the clay may be too wet.
How do I save a pot that has gone too dry?
Mist it lightly, wrap it loosely in plastic for an hour or two, and try again. Do not soak it, because that weakens the surface. If it is badly dry, consider trimming it by hand with a rasp and wiping it with a damp sponge.
Final Thoughts
Trimming pottery rewards patience and a good setup. Wait for leather hard, keep the pot centered, use a sharp tool, and take light passes. Your pots will be lighter, better balanced and more pleasant to hold, and they will fire more reliably.
If you are setting up a throwing and trimming area, take a look at the full range of pottery wheels and wheel accessories at The Kiln Depot. Questions about which wheel suits your studio? Contact us and we will help you choose.
