Most people buy beginner pottery tools in a rush, then find half of them sitting in a drawer six months later. The better approach is to buy in stages, matched to what you are actually making right now. This guide puts beginner pottery tools in a sensible order, so each purchase earns its place before you move on to the next.
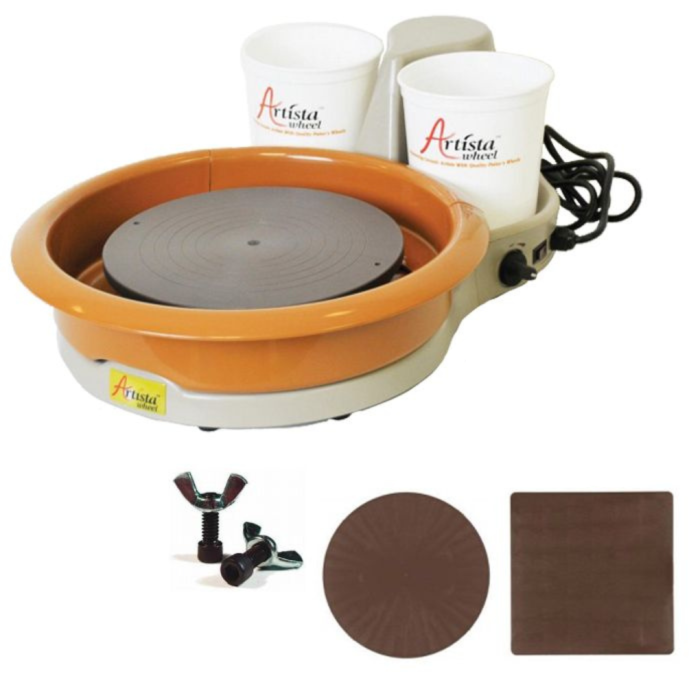
Table of Contents
Quick Answer
Start with a small hand-building kit: a wire cutter, a needle tool, a few ribs, a sponge, a fettling knife and a board to work on. Add trimming loops and a wheel only when you know you enjoy throwing. Buy a kiln last, and only after you have tried studio firing. The right beginner pottery tools are the ones that match your next project, not a complete studio on day one.
Stage One of Beginner Pottery Tools: Hand-Building Basics
If you are working at a kitchen table or in a rented studio space, your first beginner pottery tools are cheap and simple. You can make pinch pots, coil pots and slab pieces with very few items.
- A wire clay cutter for slicing blocks and lifting pieces from a board
- A needle tool for scoring, marking and trimming edges
- A fettling knife for clean cuts through leather-hard clay
- A flexible rib and a firm rib for smoothing
- A natural sponge for wiping and softening edges
- A canvas or wooden work board
- A rolling pin and two wooden guides for even slabs
We already list a fuller set in our post on essential tools for beginner potters, so treat this section as the short version. If you plan to press clay into forms, our guide to pottery molds for beginners explains what to look for.
What to skip at this stage
Skip specialist stamps, texture sets and large bundles of beginner pottery tools. Most bundles include a dozen pieces you will not use, and the quality of each tends to be modest. Buy single tools you know you need.
Stage Two of Beginner Pottery Tools: Finishing and Surface Work
Once you have a few pieces drying, you will want more control over edges, handles and texture. This is where beginner pottery tools start to feel more personal.
Trimming and carving loops
Loop tools remove clay from leather-hard pieces and let you shape a foot. A pair of loops, one round and one flat, is plenty to begin with. Wooden handles with a steel loop last well if you keep them dry.
Detail brushes and a banding aid
A couple of soft brushes help with slip, underglaze and wax resist. A banding wheel is handy for decorating and for building coil pots because you can turn the work without touching it.
Storage that protects your work
Plastic sheeting, a covered bin and a damp box keep unfinished pieces from drying too fast. This is not glamorous, but dry cracked handles are among the most common beginner disappointments.
Stage Three: Choosing a Wheel Among Beginner Pottery Tools
A wheel is the biggest of all the beginner pottery tools you will buy, so it is worth waiting. Take a few classes first, because throwing is a skill that feels very different from hand-building. If you love it, a compact wheel with a reliable motor is a better first buy than a heavy, expensive model you will outgrow in a different way.
A wheel like the Speedball Artista suits small spaces and light studio use, and our pottery wheel collection shows other options at different sizes. For model advice, read our guide to the best pottery wheel for beginners before you decide.
Wheel extras worth having
Once you have a wheel, add a set of bats, a splash pan and a stool at the right height. Comfort matters, because poor posture makes throwing harder than it needs to be.
Stage Four: Kilns and Firing Tools
A kiln is the most expensive item in the whole process, and it is also the one beginners most often buy too early. Studios and community kilns let you fire pieces for a small fee while you learn what you need. Only buy a kiln when you are firing often enough to justify the space, the wiring and the running costs.
When you do buy, think about where it will live. Our guide to a safe home kiln setup covers clearances, floors and ventilation. The kiln wiring should always be done by a licensed electrician, and you should follow the manufacturer manual for installation and operation.
Browse the electric kilns and kiln furniture we stock, or ask for help sizing a kiln for the work you make.
Beginner Pottery Tools Shopping Order at a Glance
Use this table to see what to buy at each point.
| Stage | When to buy | Typical items |
|---|---|---|
| One | Before your first project | Wire cutter, needle tool, ribs, sponge, board |
| Two | After a few finished pieces | Loop tools, brushes, banding wheel, storage |
| Three | After classes in throwing | Wheel, bats, stool, splash pan |
| Four | When firing often | Kiln, shelves, cones, ventilation |
Treat the order as a guide, not a rule. If you are certain you want to throw, you can move stage three forward. Just keep the principle: buy the next tool when you feel its absence, not before. That habit keeps your beginner pottery tools useful and your budget under control.
Setting a Budget for Beginner Pottery Tools
Decide on a total before you shop, then split it across the stages instead of spending it all at once. Keep a small reserve for clay, glazes and firing fees, because these running costs add up faster than most people expect. A realistic plan for beginner pottery tools leaves room for materials, not just equipment.
Buying used
Second-hand rib sets, boards and wheels often appear through local studios and potters who are upgrading. Inspect each item before you pay. Check that a wheel runs smoothly in both directions, the foot pedal works, and the wheel head is true. Our article on buying a used pottery kiln shows the same kind of careful inspection for larger equipment.
Sharing a studio
Community studios and classes let you borrow expensive items while you decide what to buy. Many beginners get through their first year using shared kilns and wheels, and only buy their own beginner pottery tools for work at home.
Common Mistakes When Buying Beginner Pottery Tools
The same few errors show up again and again. Knowing them in advance saves money.
Buying a wheel before trying one
A wheel looks like the heart of pottery, but throwing takes months of practice. Try it in a class first, and buy only if you want to keep going.
Ignoring workspace and power
Wheels, kilns and pug mills need space, a stable floor and proper electrical supply. A kiln in particular must be installed according to the manufacturer manual, with wiring done by a licensed electrician. Check your space before you buy anything large.
Overlooking clay and glaze compatibility
Tools are only half the picture. Your clay and glaze must suit the temperature your kiln can reach, so confirm the cone rating with your supplier. Even the best beginner pottery tools will not rescue a pot made from the wrong materials.
Safety Gear Among Beginner Pottery Tools
Safety equipment belongs in the first stage of buying beginner pottery tools, not the last. Clay dust contains fine silica once it dries, and breathing it over years is a health risk. Wipe surfaces with a damp sponge, avoid sweeping dry dust, and wear a suitable respirator when you mix dry materials or sand dry clay. Our pottery studio safety guide lists what a home studio needs.
Gloves, aprons and eye protection
An apron keeps clay off your clothing, and gloves help when handling raw glaze materials. Safety glasses are worth having when you chip or grind fired pieces.
How to Choose Quality Among Beginner Pottery Tools
Price does not always predict quality. A few quick checks help you spot good beginner pottery tools before you buy them.
- Handles should be smooth, firmly attached and comfortable to hold.
- Metal edges should be straight and free from burrs.
- Ribs should flex or stay firm as described, without cracking.
- Wire should be strong enough to pull through a block of clay without snapping.
If you have a local studio, ask potters there which beginner pottery tools they would buy again. Reputable suppliers and the National Council on Education for the Ceramic Arts community can also point you to good reading and teaching resources.
Looking After Your Beginner Pottery Tools
Rinse your beginner pottery tools after each session, dry them, and store them where edges will not be damaged. Metal loops should be wiped to avoid rust. Wooden handles last longer when they are not left soaking in a bucket. A tool roll or a simple canvas wrap keeps everything together.
Sharpen loop tools with a small file when they start to drag. A sharp edge does the work for you, and it reduces the pressure that leads to chatter and torn clay.
Frequently Asked Questions About Beginner Pottery Tools
How much should I spend on beginner pottery tools?
Spend as little as you can on beginner pottery tools at the start. A basic hand-building kit costs far less than a wheel or kiln, and the tools will be useful for years. Upgrade the ones you use daily and leave the rest.
Do I need a wheel to start pottery?
No. Many potters begin with hand-building and move to the wheel later, or never move at all. Hand-building teaches clay behaviour and gives you finished work without a large investment.
Are tool kits better than buying single tools?
Kits are convenient, but they often include pieces you will not use. If you buy a kit, choose one with a good wire cutter, ribs and loops. Otherwise, build your own set of beginner pottery tools one piece at a time.
Which of the beginner pottery tools matters most?
A good wire cutter and a fettling knife are used constantly, and a sponge and a rib are used on every piece. If you can afford only a few, start with those.
Final Thoughts
The best way to approach beginner pottery tools is to buy for the work in front of you. Start small, add loops and brushes as your skills grow, and wait on the wheel and kiln until you know how you want to work. You will spend less and waste fewer tools.
When you are ready for a wheel or kiln, visit our shop to see the full range, or contact us for friendly advice on matching equipment to your space.
