If you own a pottery kiln, pyrometric cones are one of the simplest tools you can use to find out what actually happened during a firing.
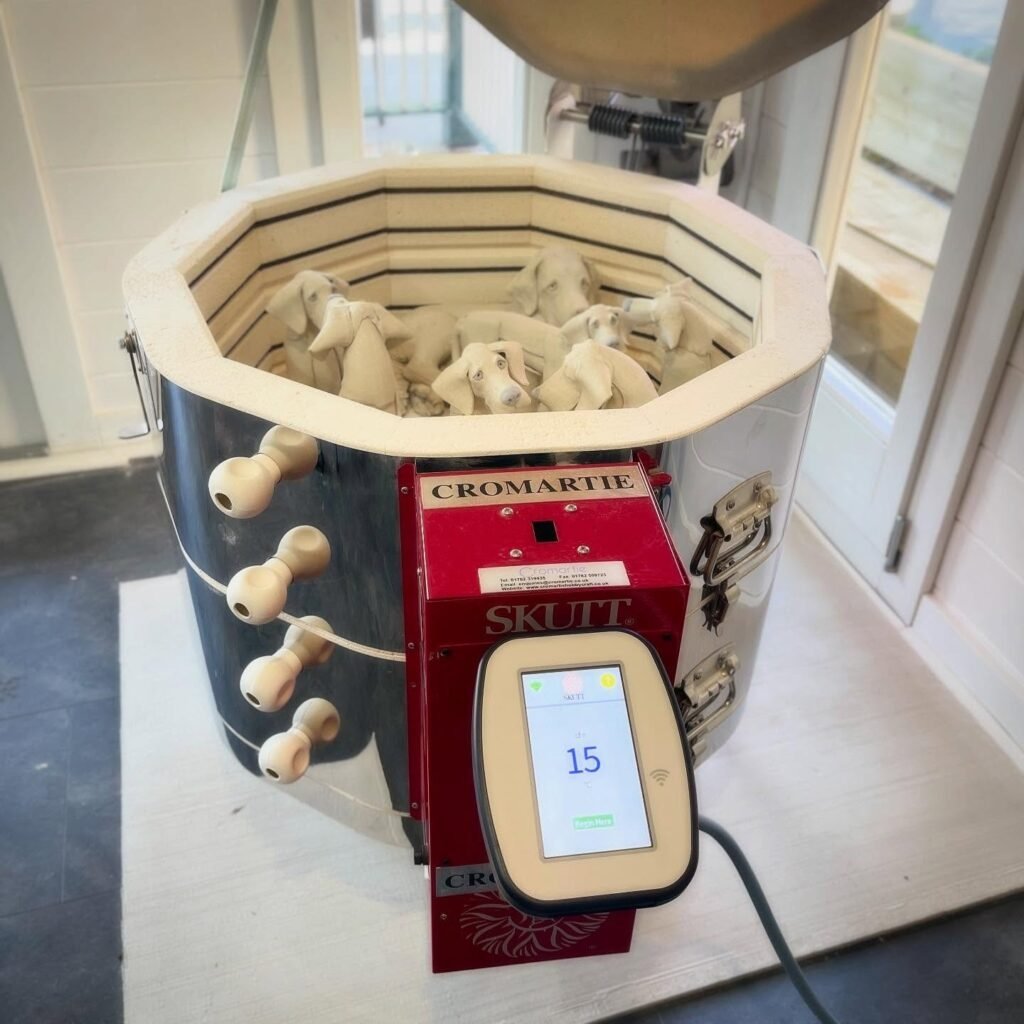
Your kiln controller can tell you the temperature it measured. A thermocouple can tell the controller when to change the firing program. But neither one directly tells you the total heatwork your pottery experienced.
That is where pyrometric cones come in.
A properly placed witness cone can show whether your firing reached the intended heatwork, whether different areas of the kiln received similar heatwork, and whether a firing that looked normal on the controller actually produced the expected result.
The Edward Orton Jr. Ceramic Foundation explains that pyrometric cones measure the combined effect of time and temperature, known as heatwork. That makes them useful even in modern electric kilns with sophisticated digital controllers.
For potters, the practical takeaway is simple:
Do not treat the number on your kiln controller as the entire story. Use pyrometric cones to verify what the kiln actually delivered.
What Are Pyrometric Cones?

Pyrometric cones are small ceramic devices formulated to bend after receiving a particular amount of heatwork.
They are made from carefully controlled ceramic compositions. Each cone is assigned a number, such as Cone 04, Cone 6, or Cone 10.
As the firing progresses, the cone absorbs heat. Once it receives the appropriate combination of temperature and time, it begins to deform.
Eventually, the tip bends downward.
That bend provides a physical record of the heatwork delivered to the cone.
The important word is heatwork.
A pyrometric cone is not simply a thermometer that reacts to one particular temperature.
The amount of heatwork required for a cone to bend depends partly on the rate at which the kiln is firing. That is why two firings can reach similar peak temperatures while producing somewhat different cone results.
Orton describes pyrometric cones as a way to verify the combined effect of time and temperature on ceramic products.
That is also why cone numbers should not be treated as simple temperature labels.
What Does a Cone Number Mean?
Cone numbers can be confusing because the numbering system runs in both directions.
For example:
- Cone 04
- Cone 03
- Cone 02
- Cone 01
- Cone 1
- Cone 2
- Cone 3
- Cone 4
- Cone 5
- Cone 6
- Cone 10
The zero matters.
Cone 04 is not the same thing as Cone 4.
The number 04 is a low-fire cone designation. Cone 4 is a much higher firing range.
This distinction becomes especially important when programming a kiln or purchasing firing supplies.
Always verify the exact cone designation recommended for your clay body or glaze.
Do not tell a supplier you need “Cone 4” when you actually mean “Cone 04.”
That single zero can completely change the intended firing range.
Pyrometric Cones Measure Heatwork, Not Just Temperature

This is the most important concept to understand.
A digital controller might display a temperature such as 2,230°F.
That number can be useful, but temperature alone does not fully describe a ceramic firing.
Imagine two firings.
In the first firing, the kiln reaches a particular temperature relatively quickly.
In the second, the kiln reaches the same temperature more slowly and spends more time near the upper end of the firing.
The two firings can produce different heatwork.
That means the same displayed peak temperature does not necessarily produce exactly the same ceramic result.
Pyrometric cones respond to this combination of time and temperature.
Orton notes that the degree of cone bending depends on the heating rate during the final portion of the firing as well as the final temperature.
This is why saying “Cone 6 equals exactly one temperature” is an oversimplification.
There are approximate temperature equivalents, but firing rate matters.
That distinction is particularly important when you start writing custom ramp-and-hold programs.
Pyrometric Cones vs a Kiln Controller
Modern kiln controllers are extremely useful.
They allow you to program ramp rates, target temperatures, holds, delays, and other firing parameters.
But a controller and pyrometric cones perform different jobs.
The controller manages the firing.
The cone helps verify the heatwork.
Think of the controller as the system making decisions and the cone as an independent physical check.
If the controller says the kiln reached the target but the witness cone is significantly underfired, that is useful information.
You now have evidence that something about the firing deserves investigation.
Possible factors include:
- Firing rate
- Hold time
- Thermocouple condition
- Element condition
- Electrical supply
- Kiln loading
- Cone placement
- Temperature distribution
- Controller calibration
- Ventilation and firing conditions
The answer is not automatically “the controller is wrong.”
Likewise, it is not automatically “the cone is wrong.”
Use the cone result as diagnostic information and investigate the complete firing system.
For more information about controller operation and what buyers should understand before choosing one, see the Kiln Depot guide to the pottery kiln controller.
What Are Witness Cones?
A witness cone is a pyrometric cone placed inside the kiln during a firing so you can inspect its final bend.
The cone is positioned close to the pottery or in another representative location inside the chamber.
After or during the firing, you inspect the cone to determine how much it bent.
Witness cones can be particularly useful for:
- Confirming firing results
- Checking heatwork
- Comparing different areas of a kiln
- Troubleshooting firing problems
- Checking a new kiln
- Checking a used kiln
- Monitoring an aging kiln
- Comparing repeated firing programs
- Investigating underfiring
- Investigating overfiring
Skutt recommends using Orton self-supporting witness cones for monitoring ceramic heatwork.
That is useful because self-supporting cones are manufactured with a geometry that eliminates the need to manually create the correct mounting angle.
Witness Cones vs Kiln Sitter Cones
These are not the same thing.
A kiln sitter uses a cone as part of a mechanical shutoff mechanism.
A witness cone is used to observe heatwork inside the kiln.
The two systems may involve similar cone numbers, but their purpose is different.
A kiln sitter cone is part of the sitter mechanism.
A witness cone is an independent indicator placed in the firing chamber.
Skutt specifically notes that junior kiln sitter cones are not intended to be used as witness cones.
This distinction matters when troubleshooting an older kiln.
If you are buying a used kiln equipped with a kiln sitter, do not assume the sitter cone is giving you the same information as a properly positioned witness cone.
The kiln sitter may shut the kiln off, while the witness cones tell you what the firing actually did at specific locations.
If you are working with an older kiln sitter, see the Kiln Depot guide to kiln sitter adjustment.
How Many Pyrometric Cones Should You Use?
The traditional approach is to use a set of three cones.
The three-cone system normally includes:
- A cone below the target
- The target cone
- A cone above the target
For example, if your target is Cone 6, a three-cone arrangement might use Cone 5, Cone 6, and Cone 7.
The purpose is not simply to have three objects inside the kiln.
The three cones give you a reference around your intended firing point.
The lower cone should bend first.
The target cone should bend to the degree expected for the firing.
The higher cone should remain standing farther into the firing unless the kiln receives enough additional heatwork to begin bending it.
This gives you more information than using a single cone.
If the target cone bends correctly while the adjacent cones behave as expected, you have stronger evidence that the firing reached the intended heatwork.
If the target cone barely moves while the lower cone bends substantially, the firing may be under the intended heatwork.
If both the target and higher cone are significantly bent, the firing may have received more heatwork than intended.
What Is the Three-Cone System?
The three-cone system is a practical way of observing the progression of a firing.
Think of the cones as a sequence.
The first cone provides an early warning.
The middle cone represents the intended firing point.
The third cone shows what happens if the firing continues beyond that point.
For a Cone 6 firing, the exact setup should follow the recommendations for your kiln, clay body, glaze, and firing program.
The important idea is that the cones should be consecutive and centered around your target.
Orton describes the three-cone approach as a way to monitor heatwork during firing.
It is particularly useful because ceramics do not always behave according to a single temperature number.
Where Should You Put Pyrometric Cones?
Placement matters.
A cone sitting in one part of the kiln does not necessarily experience exactly the same conditions as a cone somewhere else.
Skutt recommends placing witness cones approximately 2 inches from the kiln wall and in a position comparable to the thermocouple location.
The cone should have an unobstructed relationship to the thermocouple and should be positioned so that pottery or other objects are not shielding it unnecessarily.
A cone placed directly in the center of a large shelf can experience different radiant conditions than a cone positioned closer to the elements.
That does not mean center placement is always wrong.
It means you need to understand what you are trying to measure.
If your goal is to compare the heatwork near the thermocouple from firing to firing, use a consistent location.
If your goal is to investigate temperature uniformity, multiple cone packs in different parts of the kiln can be more useful.
This connects directly with the Kiln Depot’s guide to kiln temperature uniformity.
Should Pyrometric Cones Be Placed on Every Shelf?
Not necessarily for every routine firing.
For troubleshooting or evaluating a kiln, however, placing cone packs on multiple shelves can provide much more information.
Suppose you place cones on the top, middle, and bottom shelves.
After the firing, you find:
- Top cone: target cone significantly bent
- Middle cone: target cone properly bent
- Bottom cone: target cone barely bent
That pattern tells you something.
It suggests the heatwork was not identical throughout the chamber.
You can then investigate loading, element condition, ventilation, thermocouple location, firing speed, and other variables.
This is much more useful than simply looking at the controller and saying, “The kiln reached Cone 6.”
A controller may show the programmed result while the pottery at different locations experiences different heatwork.
Multiple pyrometric cones give you physical evidence from those locations.
How Should Self-Supporting Cones Be Positioned?
Self-supporting cones are designed to stand without a separate clay support.
That makes them easier to position consistently.
The cone should be standing vertically before the firing begins.
It should also have enough space around it to bend without contacting pottery, shelves, posts, or the kiln wall prematurely.
If a cone is blocked by another object, its final bend may be difficult to interpret.
The point of the cone is to bend freely.
Do not bury it behind a large piece of pottery and then expect the result to provide a reliable comparison.
If you regularly use the same kiln, establish a consistent cone location.
Consistency makes your firing records more useful.
How Do You Read a Fired Cone?
The basic idea is simple.
A cone starts upright.
As it receives heatwork, it begins to soften and bend.
The more it bends, the more heatwork it has received.
A cone that is still standing relatively upright indicates less heatwork than a cone that has bent substantially.
A fully bent cone has reached its intended heatwork range.
However, do not obsess over achieving an exact clock position as though the cone were a precision thermometer.
Paragon’s kiln guidance notes that small differences in cone bending can represent only a relatively small temperature difference.
The useful information comes from the pattern.
You want to know whether the cone reached the expected degree of bending for your firing and whether cones in different locations behaved similarly.
What Does an Underfired Cone Look Like?
An underfired cone has not bent as far as expected.
For example, you might fire to a target cone and find that the target cone is still standing relatively upright while the lower cone has bent.
That suggests the kiln did not deliver enough heatwork for the target cone.
Possible causes include:
- Firing too quickly
- Insufficient final temperature
- Insufficient hold time
- Weak heating elements
- Incorrect firing program
- Electrical problems
- Excessively heavy loading
- Poor temperature distribution
- Thermocouple issues
- Incorrect cone selection
Do not immediately change the controller program based on one unexpected cone.
First check whether the correct cone was used and whether it was positioned correctly.
Then look at the firing record.
If the same problem repeatedly occurs, the pattern becomes much more meaningful.
What Does an Overfired Cone Look Like?
An overfired cone has received more heatwork than intended.
The target cone may be completely down, while the next higher cone has also begun bending significantly.
Again, the answer is not necessarily to reduce the programmed temperature immediately.
Look at the firing rate.
Look at hold time.
Look at the controller.
Look at the cone number.
Look at the kiln’s temperature distribution.
A long hold near the end of a firing can add substantial heatwork even if the displayed temperature does not change dramatically.
This is one reason pyrometric cones are useful.
They give you a physical indication of the accumulated firing conditions.
Why Did My Cones Bend Differently?
Some variation is normal.
The kiln chamber is not necessarily identical at every point.
Element placement, loading density, shelf position, ventilation, thermocouple location, and kiln design can all affect the heatwork delivered to different areas.
If the top shelf cone bends slightly differently from the bottom shelf cone, that does not automatically mean the kiln is defective.
The question is how large the difference is and whether the difference is consistent.
For example:
Firing one: top Cone 6 slightly more bent than bottom Cone 6.
Firing two: top Cone 6 slightly more bent than bottom Cone 6.
Firing three: same pattern again.
Now you have a repeatable pattern worth investigating.
This is why recording cone results can be surprisingly valuable.
Pyrometric Cones and Kiln Temperature Uniformity
A kiln does not have to produce identical cone results in every location to be useful.
But understanding the differences helps you load it intelligently.
If one section consistently receives more heatwork, you can account for that when arranging pottery.
If another section consistently receives less heatwork, you can investigate why.
Multiple pyrometric cones can therefore act as a simple diagnostic map of the kiln chamber.
For a new kiln, this can help establish a baseline.
For an older kiln, it can reveal changes.
If your kiln previously produced similar cone bends across the chamber but suddenly develops a major difference, that change deserves attention.
Possible causes could include aging elements, electrical changes, loading differences, controller problems, or changes in ventilation.
Why Pyrometric Cones Matter in an Aging Kiln
Electric kilns change as they age.
Heating elements gradually wear.
Electrical components can develop problems.
Thermocouples can deteriorate.
The kiln may take longer to reach temperature.
A controller can continue operating even though the physical firing performance of the kiln has changed.
This is one reason pyrometric cones remain useful.
They give you an independent physical reference.
Suppose your kiln normally reaches Cone 6 with a familiar firing program.
Over several months, you notice that the firing takes longer.
Then your Cone 6 witness cones begin bending less than they used to.
That combination of evidence is more useful than simply assuming the controller is behaving normally.
Your kiln elements guide covers some of the common signs that elements are reaching the end of their useful life.
Pyrometric Cones When Buying a Used Kiln
Witness cones can also be useful before purchasing a used pottery kiln.
A used kiln can look perfectly acceptable from the outside.
The brick may be intact.
The lid may close.
The controller may turn on.
The elements may glow.
But none of those observations tells you exactly how evenly the kiln delivers heatwork.
A test firing using appropriately selected witness cones can provide another layer of evidence.
Skutt recommends test firing a kiln with witness cones placed at representative locations.
For a used kiln, this can help identify:
- Uneven firing
- Weak heating zones
- Element problems
- Controller discrepancies
- Loading issues
- Thermocouple problems
- Electrical problems
If you are evaluating used equipment, read the full used pottery kiln inspection guide before purchasing.
Pyrometric Cones for a New Kiln
A new kiln should not simply be assumed to be perfect because it is new.
A test firing gives you a baseline.
Skutt recommends using witness cones during test firing and placing cones on the shelves in representative positions.
This gives you an opportunity to learn how the kiln behaves before you load an expensive batch of finished pottery.
Record the results.
Write down:
- Cone numbers used
- Firing program
- Firing speed
- Hold time
- Kiln load
- Cone location
- Final cone bends
- Firing duration
- Any unusual observations
Those records become valuable later.
If the kiln changes, you have something to compare against.
Can You Use Pyrometric Cones in an Electric Kiln?
Yes.
In fact, they are particularly useful in electric kilns because they provide an independent check against the controller and thermocouple.
Modern electric kilns do not make witness cones obsolete.
They make them easier to use.
The controller handles the firing automatically.
The cones provide a physical reference for what happened inside the chamber.
This is especially useful when firing valuable work, experimenting with a new glaze, testing a new firing schedule, or troubleshooting inconsistent results.
The Kiln Depot’s guide to the best pottery kiln for Cone 6 explains why Cone 6 firing depends on more than simply selecting a kiln with a high maximum temperature.
Do Pyrometric Cones Tell You the Exact Temperature?
No.
This is one of the most common misunderstandings.
Pyrometric cones have temperature equivalents, but the actual temperature associated with a cone’s bending depends on firing rate and other conditions.
Orton provides temperature equivalent information based on specific heating rates.
Therefore, do not say:
“That cone means the kiln reached exactly 2,230°F.”
A better statement is:
“That cone indicates the kiln delivered approximately the expected heatwork under the conditions of the firing.”
That distinction is much more technically accurate.
Cone 6 Is Not Always One Exact Temperature
Cone 6 is often associated with a temperature around the low 2200s Fahrenheit.
But treating Cone 6 as one universal temperature ignores heatwork.
A faster firing and a slower firing can produce different cone behavior.
That is why clay and glaze manufacturers specify firing ranges and schedules rather than simply saying “heat this to one exact temperature.”
If you fire Cone 6 stoneware, follow the recommendations for the specific clay and glaze you are using.
Do not build your entire firing strategy around a temperature chart without considering the firing schedule.
What If the Controller Says Cone 6 but the Cone Says Something Different?
This is exactly the situation where witness cones become useful.
First, stop and verify the basics.
Check:
- Was the correct cone used?
- Was the cone positioned correctly?
- Was it standing at the correct angle?
- Was it blocked by pottery?
- Was the firing program correct?
- Was a hold entered?
- Did the firing rate behave as expected?
- Did the kiln take significantly longer than normal?
- Are the elements aging?
- Is the thermocouple in good condition?
- Was the kiln loaded unusually densely?
- Did the electrical supply behave normally?
Only after reviewing those factors should you decide what needs changing.
A cone result is evidence.
It is not automatically a diagnosis.
How Pyrometric Cones Help Troubleshoot a Kiln
One of the best uses of pyrometric cones is troubleshooting.
Suppose the kiln is taking longer than usual.
You place witness cones in several locations.
The results show that every cone is underfired.
That points toward a broader firing problem.
Now imagine the middle cone is correct but the bottom cone is substantially underfired.
That suggests a distribution problem rather than simply an incorrect target.
Now imagine one cone is dramatically different while the others are similar.
That could justify investigating that particular zone, element, loading arrangement, or local obstruction.
The cones do not tell you exactly which component failed.
They help narrow the problem.
That is why experienced potters do not throw away the physical evidence after every firing.
Pyrometric Cones and Firing Records
If you fire regularly, keep records.
You do not need an elaborate spreadsheet.
A simple notebook can work.
Record the firing date, program, target cone, load, and cone results.
For example:
September 30
Target: Cone 6
Program: Medium
Load: 80% full
Top Cone 6: slightly over
Middle Cone 6: correct
Bottom Cone 6: slightly under
That information becomes useful after ten or twenty firings.
You may discover that the bottom of your kiln consistently receives slightly less heatwork.
Or you may discover that a particular firing program consistently produces overfiring.
Without records, every firing becomes a fresh guess.
With records, you can identify patterns.
Common Pyrometric Cone Mistakes
Using the wrong cone number
Cone 04 and Cone 4 are not interchangeable.
Always verify the complete cone designation.
Treating cone numbers as exact temperatures
Cones measure heatwork.
They are not simple temperature stickers.
Using kiln sitter cones as witness cones
A cone intended for a mechanical kiln sitter is not automatically appropriate as a witness cone.
Putting cones in random locations
If you want useful comparisons, use consistent placement.
Blocking the cones
Pottery, shelves, or other objects can interfere with observation and heat exposure.
Using only one cone for troubleshooting
One cone can tell you something.
Multiple cone locations can tell you much more about kiln uniformity.
Ignoring the firing rate
The same cone number does not correspond to one universal temperature under every firing rate.
Changing the firing program after one strange result
One firing can contain unusual variables.
Look for repeatable patterns before making major changes.
Not recording cone results
If you do not record what happened, it becomes difficult to identify gradual changes in kiln performance.
How Often Should You Use Pyrometric Cones?
There is no single rule that every potter must follow.
For routine production firing, some potters may use witness cones less frequently once their kiln and firing schedules are well understood.
However, there are situations where using pyrometric cones is particularly valuable.
Use them when:
- Testing a new kiln
- Buying a used kiln
- Changing firing programs
- Changing clay bodies
- Testing new glazes
- Troubleshooting underfiring
- Troubleshooting overfiring
- Investigating uneven firing
- Replacing elements
- Replacing a thermocouple
- Changing kiln controllers
- Comparing kiln shelves or loading arrangements
- Establishing a baseline for a kiln
Skutt recommends witness cones as part of regular monitoring of kiln heatwork.
For expensive or technically demanding firings, the small cost of cones can provide useful information about a much more expensive load.
Pyrometric Cones Are Cheap Insurance for Expensive Firings
A box of cones is inexpensive compared with a kiln load of finished pottery.
That matters.
If you are firing a large production load worth hundreds or thousands of dollars, the cost of a few witness cones is negligible.
The cone can give you information about the firing that your controller cannot provide by itself.
That makes pyrometric cones one of the cheapest diagnostic tools in a pottery studio.
The Kiln Depot currently carries Orton Self Support Cone 018 and other kiln equipment and supplies.
Always select the cone number appropriate for your actual firing.
Pyrometric Cones and the Kiln Peephole
A peephole gives you a way to observe witness cones without opening the kiln.
That is one reason proper cone placement and peephole positioning can work together.
If your kiln allows safe viewing of cones through a peephole, place the cone where it can be observed without opening the lid.
Do not put yourself in a dangerous position trying to inspect a firing.
Use appropriate eye protection and follow your kiln manufacturer’s instructions.
The Kiln Depot’s kiln peephole guide explains the broader role of peepholes in observation and ventilation.
Should You Use Pyrometric Cones on Every Firing?
For many potters, the answer depends on how much information they need from each firing.
If you are firing a familiar kiln, familiar clay, familiar glaze, and familiar program, you may not need an extensive cone setup every time.
But that does not make cones unnecessary.
They remain one of the simplest ways to verify heatwork.
If something changes, cones become especially valuable.
For example, if a kiln suddenly begins taking two hours longer to reach the same target, place witness cones in the kiln and compare the results with previous firings.
The combination of firing time and cone behavior can tell you much more than the controller display alone.
A Practical Pyrometric Cone Setup
For a normal test firing, a practical setup is:
1. Choose the correct target cone
Base this on your clay or glaze manufacturer’s recommended firing range.
2. Select adjacent cones
Use a lower cone, target cone, and higher cone.
3. Use self-supporting cones when appropriate
This removes uncertainty about mounting angle.
4. Place the cones where they can be observed
Use the kiln peephole if the kiln design allows it.
5. Keep cone placement consistent
Especially when comparing firing results over time.
6. Avoid blocking the cones
Give them room to bend.
7. Record the firing
Write down the program, target, load, and results.
8. Inspect the cones after cooling
Compare the final bends between shelves or locations.
9. Look for patterns
One strange cone is less useful than a repeatable difference across multiple firings.
10. Investigate before changing the program
Use the cone result as diagnostic evidence.
Pyrometric Cones vs Temperature Measurement
The best approach is not to choose between cones and a digital controller.
Use both.
The controller gives you programmable control.
The thermocouple gives the controller temperature information.
The pyrometric cones provide physical evidence of heatwork.
Each has a different role.
A well-managed kiln operation uses those pieces of information together.
That is particularly important as equipment ages.
A controller can continue displaying temperatures while the kiln’s firing characteristics gradually change.
A witness cone gives you another reference point.
What Pyrometric Cones Can Tell You About Your Kiln
Used properly, cones can answer practical questions such as:
Did the kiln deliver the intended heatwork?
The target cone gives you evidence.
Is the firing consistent from shelf to shelf?
Multiple cone packs can show differences.
Is a new firing program producing the expected result?
Compare cone bends against the target.
Has an aging kiln changed?
Compare current cone results with historical records.
Is a used kiln firing evenly?
Test cones can help reveal differences across the chamber.
Did a controller change affect the firing?
Compare cone results before and after the change.
Is the firing too fast or too slow near the end?
Cone behavior can provide useful evidence alongside the firing log.
This is why pyrometric cones remain relevant even as kiln controllers become more sophisticated.
Final Thoughts: Why Pyrometric Cones Still Matter
Digital kiln controllers have made ceramic firing easier, more repeatable, and more programmable.
They have not made pyrometric cones obsolete.
If anything, a modern controller makes it easier to use cones intelligently because you can compare physical cone results with detailed firing records.
The basic principle is straightforward:
The controller tells you what the kiln was programmed to do. The cone helps show you what the firing actually delivered.
Use the correct cone number.
Use properly positioned witness cones.
Understand the difference between heatwork and simple temperature.
Keep cone placement consistent.
Use multiple cone locations when troubleshooting uniformity.
Record your results.
And do not make major changes to a firing program based on one unexplained cone result.
For a new kiln, pyrometric cones can establish a useful baseline.
For a used kiln, they can provide valuable evidence during evaluation.
For an aging kiln, they can reveal changes in firing behavior.
For a production studio, they can help verify consistency.
And for anyone firing expensive pottery, they provide inexpensive physical evidence that can be worth far more than the cost of the cones themselves.
If you are buying a kiln, selecting equipment for Cone 6, or troubleshooting an existing setup, treat pyrometric cones as part of the overall firing system rather than an outdated accessory.
The goal is not simply to make the controller display the right number.
The goal is to deliver the right heatwork to the pottery.
