Recycling clay is the quickest way to stop throwing money into the trash can, but plenty of studios do it badly. A bucket of mixed scraps left under the wheel does not turn into good clay on its own, and one bad batch can cost you a week of cracked pots.
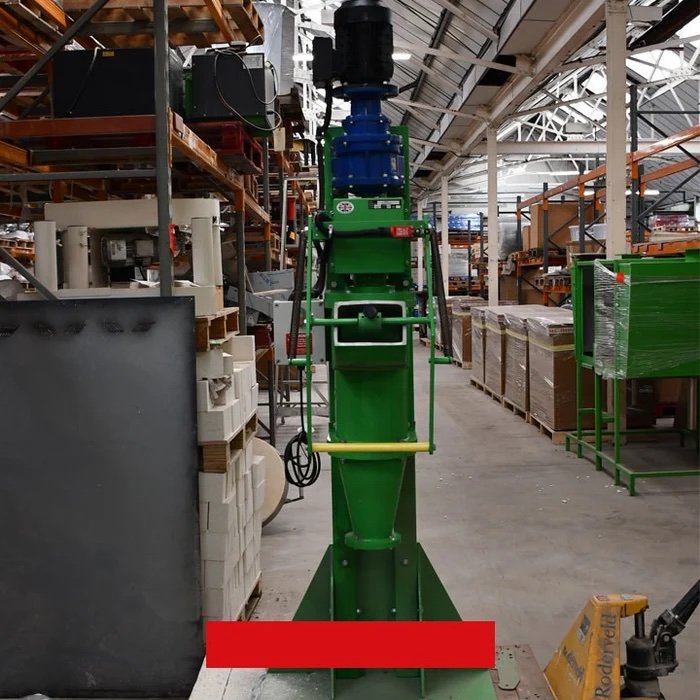
Table of Contents
Quick Answer
Recycling clay works when you treat scraps as an ingredient, not a leftover. Keep each clay body in its own labeled bucket, sort scraps by moisture stage, keep plaster and glaze out, rehydrate slowly, and wedge or pug the result until it is even and free of air pockets.
Then test a small batch before you commit it to a big piece. The sections below walk through each step of recycling clay and the seven mistakes that most often ruin reclaimed clay.
Why Recycling Clay Goes Wrong in Most Studios
Most failures come from mixing things that should not be mixed. Two or three clay bodies in one bucket will shrink at different rates and mature at different temperatures, so the blend can crack while drying or bloat in the kiln.
The second cause is contamination that slips into your recycling clay. A chip of plaster, a smear of glaze from a dirty sponge or a bit of bisque looks harmless in a bucket, but each one can show up later as a pop, a blister or a weak spot in a finished pot.
The third cause is impatience. Recycling clay properly takes a couple of days of waiting, and rushing the drying or skipping the wedging is how soft, lumpy, airy clay ends up on the wheel.
Sort Scraps Before Recycling Clay
Sorting is the cheapest step in recycling clay and the one that prevents the most heartache. Set up one lidded bucket per clay body, label each with the clay name and its firing range, and make everyone who uses the studio follow the same system.
Mistake 1: Mixing Different Clay Bodies
Stoneware, porcelain and a red earthenware body all behave differently. When recycling clay from several bodies together you get an unpredictable middle: shrinkage that matches none of them, color that looks muddy, and a clay that may not fit any of your glazes.
If you only have a small amount of a second clay, set it aside until you have enough for its own bucket. Do not tip it into the main batch to save a little space.
Mistake 2: Mixing Firing Ranges
A low-fire clay fired to a stoneware temperature can slump or bloat, and a stoneware clay fired too low stays chalky and weak. Even two clays that look alike can have different maturing temperatures, so check the label or the supplier’s data sheet and keep the cone ranges apart.
White and light clays are especially sensitive to contamination from darker bodies. A small amount of iron-bearing red clay can leave brown specks that show through a clear or white glaze.
Sort Scraps by Moisture Stage
Scraps used for recycling clay fall into stages, and each stage needs a different treatment. A quick table helps new studio members understand where each piece of waste belongs.
| Stage | How it feels | What to do |
|---|---|---|
| Wet trimmings and slop | Soft, sticky or liquid | Let it settle, pour off the clear water, then dry it to a wedgeable state |
| Leather-hard scraps | Cool, firm, still cuttable | Keep in a covered bucket, or slice thin and slake in water |
| Bone-dry scraps | Pale, chalky, no cool feeling | Break up and slake in water |
| Bisque or glazed ware | Hard, fired | Keep it out of the bucket completely |
Fired pottery has changed chemically and cannot be turned back into plastic clay. Crushed bisque is sometimes used as grog in carefully controlled amounts, but loose shards in a recycling bucket are a problem, not an ingredient.
Mistake 3: Letting Contamination Into Your Recycling Clay
Treat the reclaim bucket like a food prep area: only clean, known material goes in. The usual culprits are easy to avoid once you know them.
- Plaster chips from bats or drying slabs. Plaster that gets fired inside a pot can absorb moisture later and cause pops and craters, so scrape plaster surfaces gently and check scraps by hand.
- Glaze and slip from rinse water, sponges and tools. Even a little glaze can cause unexpected fluxing in the clay body.
- Wax resist, paper, plastic and sponge fibers that burn out and leave voids.
- Bisque shards and kiln wash flakes that become hard lumps in the middle of a thrown wall.
Keep a separate bucket for glaze and rinse water so that it never meets your clean reclaim. If you cannot tell what is in a bucket, it is not worth the risk to a kiln load.
Mistake 4: Rushing the Slaking Stage
Slaking is the first real step of recycling clay. It means letting dry clay soak until it falls apart on its own. Break bone-dry scraps into small pieces, drop them in a bucket, and cover them with water. Leave them alone for several hours or overnight, longer for thick chunks.
Resist the urge to stir early. Stirring thick, half-slaked clay traps pockets of dry lumps that stay hard through the whole recycling process. Once the pieces have collapsed, pour off the clear water on top and let the slurry thicken.
Dust Safety When Recycling Clay
Dry clay dust contains fine silica, so never sweep dry scraps or dust. Wet-mop and sponge surfaces, and wear a respirator suited to fine dust when you handle dry or powdered clay. Follow the guidance on your clay supplier’s safety data sheet.
Drying Slurry to a Workable Consistency
In recycling clay, slurry has to lose water before it becomes clay. The classic approach is to spread it on a dry plaster slab or a canvas-covered board and turn it over as it stiffens. Plaster pulls water out quickly, so check it often and do not let the edges go bone dry.
Avoid drying clay in direct sun or near a heater. The outside hardens while the middle stays soft, and you end up with a crust that is a nuisance to wedge. A slower, even dry gives you a smoother batch.
Our guide on how to reclaim pottery clay at home covers the drying methods in more detail, including the simple bucket and bat setup that small home studios use.
Mistake 5: Skipping Wedging and De-Airing
Recycling clay almost always leaves air trapped in the batch. Even if it feels smooth, trapped air bubbles can cause blowouts in the kiln and make centering difficult on the wheel. Wedge every batch thoroughly before use, and cut the lump in half to check for holes.
A pug mill speeds this up considerably, since it mixes, compresses and extrudes clay in one pass. Some models also include a vacuum chamber for de-airing, but not all do, so check the manufacturer’s specifications before you buy. If you are weighing options, take a look at our pug mills and clay mixers, including the refurbished Gladstone G55 vertical pug mill.
No pug mill? A sturdy wedging table and good technique still produce excellent results. Our post on reclaiming clay without a pugmill explains how.
Mistake 6: Never Testing Reclaimed Clay
Recycling clay changes how it feels. Reclaimed batches can be softer, stiffer, more plastic or a little shorter than fresh clay, depending on how you handled them. Throw a small test piece before you plan a large bowl or a set of mugs.
For a real check, roll a test tile, scratch a line 10 centimeters long into it, and measure the line after drying and again after firing. Comparing that result with the same test on fresh clay tells you whether your reclaim shrinks the same way. For deeper background on clay behavior, the Digitalfire reference library is a trusted place to read.
Fire test pieces with your regular glazes too. If a glaze crawls or pinholes on your recycling clay batch only, you will have caught a contamination problem before it ruined a full shelf.
Mistake 7: Recycling Clay Without a Consistent Plan
The last mistake is treating each bucket as a one-off. If one batch is pure reclaim, the next is half fresh clay and the third is slightly too wet, your throwing and drying times will never feel predictable.
Decide on a routine and stick to it. Many potters blend reclaimed clay with a portion of fresh clay of the same body, which refreshes the plasticity. Pick a ratio that works for your pots, write it down, and use it every time.
A Simple Weekly Routine for Recycling Clay
A short, repeatable routine for recycling clay keeps the buckets from piling up. Here is a schedule that works in a small studio:
- After each session: scrape the wheel, trim scraps and slop into the right labeled bucket and close the lid.
- Once a week: slake bone-dry scraps and pour off the clear water from settled slop.
- Every few days: turn the slurry on the plaster slab and check its consistency.
- When it reaches wedging stiffness: wedge or pug it, bag it, label the bag with the clay name and date.
Bagged reclaim that sits for a few weeks often feels more plastic, as the water spreads evenly through the clay. Many potters like to let a batch rest before use.
When to Throw Reclaimed Clay Away
Not every batch of recycling clay deserves a second life. Discard clay when you cannot say what went into it, when it has been mixed with glaze or plaster in noticeable amounts, or when it has dried unevenly into hard, mixed lumps that will not come apart.
Surface mold on stored clay is common and usually only a cosmetic issue, but anyone with mold sensitivities should be careful handling it. Keep stored clay in sealed bags to slow it down.
Frequently Asked Questions About Recycling Clay
Can you recycle clay that has already been bisque fired?
No. Once clay has been fired, it undergoes a permanent chemical change and will not become plastic again, no matter how long you soak it. Only unfired clay can be reclaimed.
How long does recycling clay take?
Plan on a few days at minimum. Slaking takes hours to a day, drying slurry on plaster takes a day or more depending on humidity, and wedging takes an afternoon for a normal batch. A rushed batch of recycling clay usually shows its problems on the wheel.
Do you need a pug mill for recycling clay?
No, but a pug mill makes the work faster and gives more consistent results, especially if you produce a lot of scrap. Hand wedging a modest amount works fine in a small studio.
Can you mix different colors when recycling clay?
Only if the clays share a firing range and similar shrinkage. Marbled techniques use compatible bodies on purpose. Mixing leftover scraps at random usually produces an unpredictable clay.
Final Thoughts
Recycling clay is worth doing well. Sort by clay body, keep contaminants out, take your time with slaking and drying, wedge or pug thoroughly, and test before you commit. Get those habits right and reclaimed clay becomes a dependable material instead of a gamble.
If you are ready to upgrade your studio setup, browse our pug mills and clay mixers, or contact us and we will help you choose the right equipment for your space.
