If there is one thing you do not want inside a pottery kiln, it is liquid water trapped inside a piece of clay.
That is where kiln candling can help.
Kiln candling is the practice of gently heating pottery at a low temperature for an extended period before the main firing continues. The goal is to give residual moisture more time to leave the clay before the kiln reaches temperatures where trapped water can become a serious problem.
It is particularly useful when firing thick pieces, large sculptures, heavy greenware, or work that you are not completely confident is bone dry.
But there is an important distinction:
Kiln candling is not a substitute for properly drying pottery.
You should never deliberately put wet clay into a kiln and assume that candling will make it safe.
The pottery should already be thoroughly dry before it enters the kiln.
Candling is an additional precaution that provides a slow, gentle beginning to the firing.
Skutt’s KilnMaster documentation includes candling as a slow-firing approach, with a sample program beginning at 150°F and holding there for six hours before continuing the firing. That is a manufacturer example, not a universal schedule for every kiln or clay body.
So when should you candle?
How long should you do it?
And does every firing need it?
Let’s break it down.
What Is Kiln Candling?
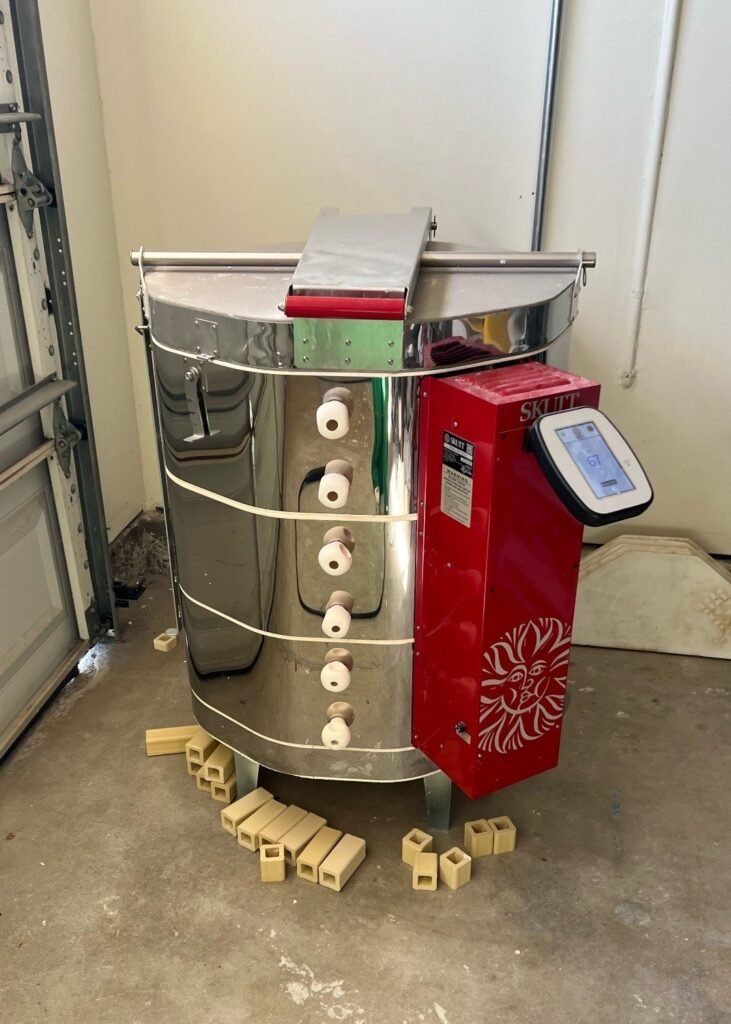
Kiln candling is a low-temperature drying stage at the beginning of a ceramic firing.
The kiln is heated slowly and held at a relatively low temperature so that residual moisture can escape gradually.
The term “candling” comes from the idea of gently warming the ware rather than immediately subjecting it to a normal firing schedule.
A traditional candling stage may be used before a bisque firing.
The process is especially useful when the potter has reason to believe that moisture could still be present in the clay.
That might include:
- Thick-walled pottery
- Large sculptures
- Heavy bases
- Large handles or attachments
- Work made recently
- Pieces dried in humid conditions
- Large solid sections
- Pieces with enclosed or difficult-to-dry areas
- Work where drying conditions were uncertain
The purpose is not to fire the clay.
The purpose is to give remaining moisture a safer path out before the firing becomes aggressive.
Why Does Pottery Need to Be Completely Dry?
Clay contains water at several stages of its life.
Some of that water is simply moisture between the clay particles.
As greenware dries, much of that moisture leaves the piece naturally.
The problem occurs when water remains trapped inside the clay as the kiln temperature rises.
Liquid water changes into steam as it is heated.
Steam occupies substantially more volume than liquid water.
If that steam cannot escape quickly enough, pressure can build inside the clay.
The result can be a cracked or exploded piece.
In a loaded kiln, an explosion is more than an inconvenience.
Fragments of greenware can land on neighboring pieces, shelves, and kiln furniture.
If glazed ware is present, debris can become permanently fused into the glaze.
The Kiln Depot’s guide on firing bisque and glaze ware covers this risk in more detail.
Kiln Candling Does Not Make Wet Pottery Safe
This needs to be emphasized.
Do not take a piece of visibly damp pottery, put it into the kiln, and assume a six-hour candle will solve the problem.
The correct sequence is:
Build the piece → dry it thoroughly → inspect it → load it → use candling if appropriate → begin the firing.
Candling is an additional margin of safety.
It is not permission to fire wet ware.
Skutt’s operating guidance tells users to ensure greenware is bone dry before firing.
If a piece still feels cool compared with a known dry piece, moisture may still be evaporating from it.
That is a much better test than assuming the outside looks dry.
How Kiln Candling Works
The physics are straightforward.
At relatively low temperatures, remaining moisture can gradually migrate out of the clay.
The goal is to avoid creating a situation where a large quantity of water suddenly becomes steam inside a piece that cannot release it quickly enough.
As the kiln slowly warms, the pottery has more time to equalize with the rising temperature.
That is especially useful for thick work.
A thin mug and a large solid sculpture do not behave identically during heating.
Heat enters the outside of the object first.
The interior takes longer to respond.
That means the thicker the piece, the more important a controlled early stage can become.
Orton explains that heat moves through ceramic ware by conduction, convection, and radiation and that firing more slowly allows heat to penetrate the interior of the ware more effectively.
You can read its explanation of heat transfer in kilns.
What Temperature Should You Use for Kiln Candling?
There is no universal candling temperature that applies to every kiln and clay body.
Skutt’s older KilnMaster documentation provides a sample candling program beginning with a rate of 50°F per hour to 150°F, followed by a six-hour hold at 150°F before continuing with the rest of the firing schedule.
That is useful evidence of how a major kiln manufacturer approaches the concept.
It should not be copied blindly into every kiln.
Your clay manufacturer may provide different recommendations.
Your kiln controller may use different programming terminology.
Your kiln may have different capabilities.
Your ware may be significantly thicker or thinner.
The important principle is slow, controlled heating at the beginning of the firing rather than chasing a particular temperature as though it were a universal rule.
How Long Should You Candle Pottery?
This depends on the work.
There is no single correct number of hours.
A small, genuinely bone-dry mug may not require a long candling stage.
A large sculpture with thick sections may justify considerably more caution.
Skutt’s sample program uses a six-hour hold at 150°F, but again, that is an example program rather than a universal prescription.
Factors that influence the appropriate approach include:
- Thickness
- Shape
- Clay body
- Drying history
- Ambient humidity
- Size of the piece
- Whether the piece contains hollow sections
- Whether the piece was assembled from multiple parts
- Whether you have any reason to doubt that it is fully dry
When in doubt about a specific clay body, use the clay manufacturer’s firing recommendations.
Does Every Pottery Firing Need Kiln Candling?
No.
If your greenware has been thoroughly dried under appropriate conditions and consists of relatively thin, evenly constructed pieces, a dedicated long candling stage may not be necessary.
Many potters fire routine work without a separate prolonged candling program.
The need for additional caution increases as the work becomes thicker, larger, or more difficult to dry evenly.
That is why experienced potters do not treat candling as a mandatory step for every firing.
They treat it as a tool.
Use it when the situation warrants it.
When Kiln Candling Makes the Most Sense
There are several situations where candling deserves serious consideration.
Thick-walled pottery
Thick clay contains more material through which moisture must travel.
The outside can feel dry while the interior still contains moisture.
Large sculptures
Large sculptures can have substantial internal mass.
Their size makes uniform drying more difficult.
Heavy bases
A sculpture can be relatively thin in most areas but have a thick solid base.
That base can retain moisture longer than the rest of the piece.
Large attachments
Thick handles, feet, decorative additions, and joined sections can dry differently from the main body.
High humidity
Environmental conditions influence drying.
A piece that dries quickly in a warm, dry studio may take substantially longer in a humid environment.
Uncertain drying history
If you do not know whether a piece was sufficiently dried, additional caution is reasonable.
Large production pieces
The larger the potential loss if something explodes, the more worthwhile it can be to use a cautious firing procedure.
Candling Large Sculptures
Large sculpture is one of the strongest use cases for kiln candling.
The challenge is not simply getting the surface dry.
You need to consider the entire object.
A sculpture may contain:
- Thick clay walls
- Hollow chambers
- Internal supports
- Joined sections
- Large feet
- Thick decorative elements
- Enclosed spaces
- Areas with restricted air movement
All of these can affect drying.
For very large or unusually constructed work, the drying strategy may be more important than simply adding a longer candle.
Good construction practices matter.
Hollow large forms are generally easier to dry and fire safely than unnecessarily solid masses.
Where appropriate, vent holes and carefully designed construction can help trapped air and moisture escape.
Can You Candle Thick Pottery?
Yes.
Thick pottery is one of the situations where kiln candling can be particularly useful.
But thickness alone does not tell you exactly how long to candle.
Consider a 1-inch-thick slab.
Now consider a hollow sculpture with a 1-inch wall.
They have very different internal structures and drying behavior.
A solid section can retain moisture deep inside.
A hollow form has a larger surface area and may dry more evenly if constructed correctly.
The safest approach is to combine proper drying with a conservative firing schedule.
What Happens If You Skip Candling?
Nothing necessarily happens.
If the pottery is genuinely bone dry, a normal firing can proceed successfully without a dedicated long candling stage.
The risk comes from confusing “I usually get away without candling” with “candling is never useful.”
A potter who has fired thousands of thin mugs under controlled drying conditions may have little need for prolonged candling.
The same potter may choose a much more conservative schedule when firing a large sculpture.
That is not inconsistency.
It is adapting the firing process to the material.
Candling vs. Preheating
The terms can overlap.
Both involve gently warming the kiln and ware before the main firing.
However, “candling” generally refers specifically to the low-temperature drying stage used to remove residual moisture from greenware.
“Preheating” can be used more broadly.
A potter might use the term preheating to describe warming the kiln or ware before a firing schedule begins.
For SEO purposes, you will often see people search for both terms.
For practical purposes, the important question is:
Are you deliberately using a low-temperature stage to give residual moisture time to escape?
If yes, you are essentially describing candling.
Kiln Candling vs. Drying Outside the Kiln
These are not substitutes.
Drying pottery before firing should happen before the kiln is loaded.
A controlled studio drying process gives moisture time to leave the clay naturally.
Candling happens after loading as an additional precaution.
Think of them as two different stages.
Studio drying: remove as much moisture as possible before firing.
Kiln candling: provide a gentle early firing stage for any residual moisture.
If your pottery routinely needs many hours of candling because it is still damp when loaded, the bigger problem may be your drying process.
Do not use the kiln as your primary drying cabinet.
Can You Candle Pottery Overnight?
Technically, a programmed controller can run a low-temperature hold for an extended period.
But the appropriate duration depends on the ware and firing process.
An overnight candle may be useful for particularly thick work in some circumstances.
It should not become a substitute for proper drying.
If your kiln and controller support delayed starts, holds, or ramp-and-hold programs, use the manufacturer’s instructions to program the firing correctly.
The Kiln Depot’s pottery kiln controller guide explains the difference between programming functions and why controller compatibility matters.
Can You Candle With a Manual Kiln?
Yes, but the procedure is different.
A programmable controller makes candling easier because you can specify a slow ramp and hold.
A manual kiln requires more active monitoring.
The goal remains the same.
Keep the early heating stage gentle enough to allow moisture to escape.
If you have to continuously adjust switches manually, the process can be more demanding and less precise.
That is one reason programmable controllers are useful for potters who frequently fire large or difficult work.
Using a Kiln Controller for Candling
Modern programmable controllers can make kiln candling relatively straightforward.
Depending on the controller, you may be able to create a ramp-and-hold segment that:
- Raises the temperature slowly
- Reaches a low-temperature target
- Holds there
- Continues into the main firing schedule
The exact programming method varies by controller.
Do not copy button sequences from a different controller model.
Use your controller manual.
The important thing is understanding the logic of the program rather than memorizing someone else’s button presses.
What If Your Kiln Does Not Have a Programmable Controller?
You can still use a cautious firing approach.
Older kilns may use kiln sitters or manual switches rather than modern programmable controllers.
In that situation, the potter has less automated control over the initial heating rate.
If you routinely fire thick work, upgrading the control system may be worth considering if the kiln itself is structurally sound and compatible with the upgrade.
But do not assume that a controller upgrade is automatically worthwhile.
The heating elements, wiring, relays, thermocouple, firebrick, electrical supply, and overall condition of the kiln matter too.
Candling and Kiln Loading
Candling does not eliminate the importance of proper loading.
Your pieces still need appropriate clearance.
Avoid placing ware directly against the heating elements.
Make sure shelves are properly supported.
Do not block the thermocouple.
Avoid stacking pieces in ways that restrict heat movement unnecessarily.
Skutt recommends maintaining clearance between ware and elements and placing shelves appropriately inside the kiln.
The Kiln Depot’s kiln shelf spacing guide covers loading and shelf placement in greater detail.
Good loading supports even heating during both the candling stage and the remainder of the firing.
Candling Does Not Prevent All Cracking
This is another important distinction.
Candling primarily addresses residual moisture and the early heating stage.
It does not solve every possible cracking problem.
Pottery can crack because of:
- Uneven drying
- Uneven wall thickness
- Poor construction
- Thermal shock
- Clay body characteristics
- Glaze fit
- Firing schedule
- Mechanical stress
- Inclusions or defects
If a piece cracks during the firing, do not automatically assume it needed a longer candle.
Look at the fracture.
Look at the shape.
Review the drying history.
Review the firing schedule.
Consider whether the piece was constructed appropriately for its size.
Candling and Thermal Shock
Candling can help reduce the risk associated with residual moisture, but it should not be confused with a general cure for thermal shock.
Thermal shock is related to rapid temperature changes and temperature gradients within a material.
A piece can be completely dry and still crack because it is heated or cooled too aggressively.
This is particularly relevant for thick or large work.
A good firing schedule therefore considers both moisture removal and thermal behavior.
The Kiln Depot’s kiln cooldown guide covers the other side of the firing cycle: cooling the finished ware safely.
How Do You Know Pottery Is Bone Dry?
There is no single visual cue that guarantees complete dryness.
A piece may look dry while still containing moisture internally.
Skutt’s operating manual gives a practical comparison method.
Take a piece of older, known-dry greenware and compare it with the newer piece.
Touch both against your cheek or forearm.
If the newer piece feels noticeably cooler, moisture may still be evaporating from it.
This is not a laboratory moisture measurement.
It is a practical studio check.
For large or critical work, allow substantially more drying time rather than relying on a quick surface inspection.
Why Thick Clay Is More Difficult to Dry
Moisture must travel from the interior toward the surface before it can evaporate.
The longer the path, the more difficult uniform drying becomes.
A thick solid piece therefore presents a greater challenge than a thin-walled piece.
This is one reason ceramic artists often hollow large sculptures.
It reduces mass and gives moisture a shorter path to the surface.
It also reduces the amount of material that has to undergo thermal changes during firing.
Candling can complement good construction.
It cannot replace it.
Does Candling Prevent Exploding Pots?
It can reduce the risk associated with residual moisture when performed as part of an appropriate firing schedule.
But it cannot guarantee that pottery will not explode.
An improperly dried piece can still fail.
A trapped air pocket, construction defect, overly rapid heating, or other problem can still cause damage.
The best protection is a combination of:
- Proper construction
- Thorough drying
- Appropriate loading
- A suitable firing schedule
- Conservative early heating when needed
- Correct kiln operation
Think of candling as one layer of protection rather than a guarantee.
Candling a Bisque Firing
This is where kiln candling is most commonly useful.
Greenware is going into its first major firing.
The clay still contains residual moisture.
The firing will eventually drive off chemically bound components and transform the clay into ceramic material.
The early stage therefore deserves attention.
For routine, thin, bone-dry pieces, a dedicated long candle may not be necessary.
For thick or uncertain work, it can be a sensible precaution.
Candling a Glaze Firing
Usually, glaze firing starts with bisqued ware rather than greenware.
Bisque ware has already undergone its initial drying and firing transformation.
That means the moisture concern is generally much lower than during a greenware bisque firing.
However, bisqueware can still absorb moisture from the environment.
A piece that has been washed, soaked, stored in a damp environment, or otherwise exposed to moisture may require appropriate drying before glaze firing.
A prolonged candling stage is generally more relevant to greenware than ordinary dry bisqueware.
Can You Candle With the Kiln Lid Cracked?
Some traditional firing procedures use a cracked or propped lid during early stages to improve moisture release.
But you should not assume that every kiln should be operated this way.
Kiln construction, ventilation, controller design, and manufacturer instructions vary.
Skutt’s older documentation includes specific instructions for certain firing situations involving the lid and ventilation.
That does not make the procedure universal.
If your kiln manufacturer gives specific instructions for early firing ventilation, follow those instructions.
Otherwise, do not improvise by creating a large opening simply because you believe it will dry the kiln faster.
What About Kiln Ventilation During Candling?
Ventilation and candling work together, but they have different purposes.
Candling provides a gentle temperature stage.
Ventilation helps manage moisture and firing emissions.
A mechanical kiln vent can remove air and gases from the kiln, but the correct operating procedure depends on the vent and kiln.
Skutt’s EnviroLink system, for example, can be programmed to operate a compatible EnviroVent 2 according to the firing program.
Its documentation describes settings where the vent operates during the firing and can continue during part of the cooling cycle.
If your kiln has a vent, follow the manufacturer’s installation and operating instructions.
The Kiln Depot’s kiln ventilation guide covers the broader question of why kiln ventilation matters.
What If the Kiln Error Code Appears During Candling?
A candling stage should not generate unusual errors simply because it is slow.
However, any error message deserves attention.
For example, if the kiln fails to increase in temperature at the expected rate, the controller may eventually interpret that as a heating problem.
Possible causes can include elements, relays, voltage, thermocouple problems, or other electrical issues.
Do not assume the slow program itself caused the error.
Record the exact message and consult the controller’s documentation.
The Kiln Depot’s kiln error codes guide explains how to approach these problems systematically.
Does Candling Use More Electricity?
Yes, a long hold at low temperature uses electricity.
But the actual energy consumption depends on the kiln, insulation, ambient conditions, firing schedule, load, and controller behavior.
The fact that candling consumes electricity does not make it wasteful when it is being used appropriately to reduce firing risk.
At the same time, there is no reason to candle every small, properly dried piece for many hours simply because it feels safer.
Use the process where it provides meaningful value.
Kiln Candling for Home Studios
Home studios often have more variable drying environments than production studios.
A garage may experience large temperature and humidity swings.
A basement may be humid.
A small spare room may have limited airflow.
That makes drying history particularly important.
If your studio conditions are inconsistent, build more drying time into your process.
Use candling as an additional safeguard for pieces where moisture is a concern.
The Kiln Depot’s pottery kiln setup guide covers the broader requirements of installing and operating a kiln in a home studio.
A Practical Kiln Candling Routine
If you decide that candling is appropriate for a firing, keep the process simple.
1. Dry the pottery first
Do not put visibly damp ware into the kiln.
2. Inspect the pieces
Pay special attention to thick sections, large bases, attachments, and enclosed forms.
3. Load the kiln correctly
Maintain appropriate clearance from elements and thermocouples.
4. Select an appropriate low-temperature stage
Use the clay and kiln manufacturer’s guidance whenever available.
5. Heat slowly
The goal is gentle early heating.
6. Hold at the selected low temperature
The duration depends on the ware and firing plan.
7. Continue into the normal firing schedule
Once the candling stage is complete, proceed according to the appropriate firing program.
8. Record the firing
Write down what you did and what happened.
If the firing is successful, you now have a reference for similar work.
Common Kiln Candling Mistakes
Using candling instead of drying
This is the biggest mistake.
Candling is not a substitute for dry greenware.
Using the same candle for every piece
A thin mug and a large sculpture do not have the same drying requirements.
Choosing a temperature from a random internet post
Use manufacturer and clay-body guidance where available.
Assuming a long candle guarantees safety
It does not.
Ignoring construction problems
A poorly designed solid sculpture remains a difficult firing regardless of the candle.
Loading too tightly
Candling does not eliminate the need for proper kiln loading.
Ignoring ventilation requirements
Moisture and firing emissions still need to be managed appropriately.
Changing several variables simultaneously
If you change your drying method, clay body, firing schedule, glaze, and candling routine at the same time, you will not know what caused the result.
The Bottom Line
Kiln candling is a precaution, not a cure for wet pottery.
The most important rule is still the simplest one:
Fire only properly dried greenware.
Candling becomes useful when you want an additional layer of protection, particularly with thick pottery, large sculptures, heavy bases, difficult-to-dry forms, or work whose drying history is uncertain.
Skutt’s published KilnMaster example demonstrates the basic concept with a slow rise to 150°F followed by a prolonged hold before the main firing continues. That gives you a concrete example of how candling can be incorporated into a programmable firing schedule, but it should not be treated as a universal recipe.
The right kiln candling routine depends on the kiln, controller, clay body, construction, thickness, drying conditions, and firing schedule.
Dry the pottery thoroughly first.
Then use a gentle early firing stage when the work warrants it.
That is a much better strategy than relying on candling to rescue pottery that was never properly dried in the first place.
And if you are firing large or valuable work, remember the basic economics of kiln operation:
A few additional hours of cautious firing cost far less than replacing an entire load of pottery.
