Raku firing is one of the most exciting things you can do with clay, and one of the easiest to get wrong. Pieces go into the kiln, come out glowing, and finish in a bed of burning material within minutes. Raku firing rewards preparation, so a little planning before your first session makes the difference between a memorable day and a dangerous one.
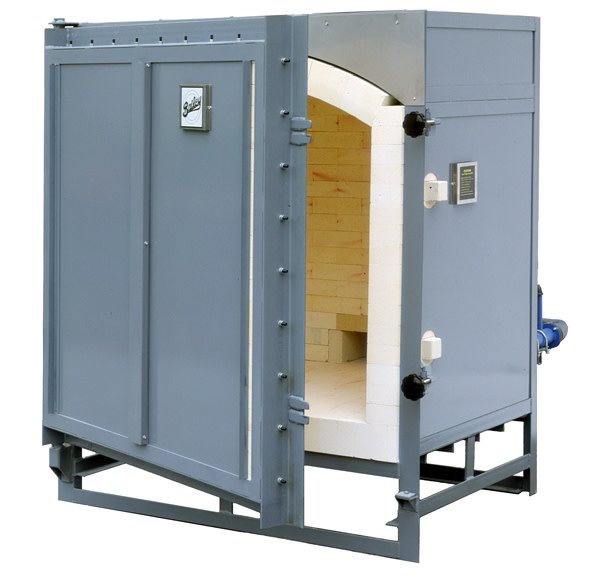
Table of Contents
Quick Answer
Raku firing is a fast, low-temperature process in which glazed pieces are heated until the glaze melts, removed from the kiln while red hot, and placed into combustible material to create smoky colours and crackle. Use clay made for thermal shock, glazes made for the process, long tongs, heat-resistant gloves, eye protection and a respirator. Fire outdoors, away from anything flammable, and always follow the kiln manufacturer’s instructions.
What Raku Firing Is
Raku has its roots in Japan, where tea bowls were removed from a hot kiln by hand. The modern Western version developed from that idea and is usually done in a small kiln, often fuelled by propane. Pieces are heated for a short time, pulled out while the glaze is molten, and then placed in a container with combustible material such as shredded paper, sawdust or leaves.
The burning material consumes oxygen. In that oxygen-poor smoke, glazes and bare clay react to produce metallic sheens, deep blacks and the cracks known as crackle. The surface you get from raku firing is hard to copy in a standard electric kiln, which is why many potters try it at least once.
Why the results look so different
Rapid cooling and reduction change the glaze surface. Bare clay absorbs carbon and turns black, while the glaze cracks and lets the smoke in. Each firing is slightly different, and that unpredictability is part of the appeal.
Clay and Glazes for Raku Firing
Clay for raku firing needs to withstand sudden temperature changes. Ordinary clay can crack or shatter when it goes from a hot kiln to the open air. Look for clay marked for raku or for thermal shock, with plenty of grog or other open material. Ask your supplier if you are not sure.
Bisque first
Pieces are normally bisque fired at a low temperature first, so they are strong enough to handle and glaze. Check with your clay supplier for the right bisque temperature. Our article on pyrometric cones explains how cones show the heat your work has received.
Choose raku glazes
Use glazes made for raku firing. The usual temperature is far lower than for stoneware, and glazes designed for it melt quickly. Do not use a standard stoneware glaze, because it will not melt.
Many raku glazes contain materials that are not food safe, and crackled surfaces are porous. Treat most raku work as decorative, and do not use it for food or drink unless the maker has confirmed otherwise.
Equipment for Raku Firing
You need a small kiln, protective gear and a handful of simple tools. A kiln for raku firing is often lightweight and heats quickly, with a lid or door that opens easily so you can lift pieces out.
- A fuel-fired kiln made for raku, used exactly as the manufacturer describes
- Long tongs made for hot work
- Heat-resistant gloves rated for the task
- A metal bin with a lid for the reduction material
- A bucket of water and a fire extinguisher nearby
- Eye protection and a suitable respirator
- Natural fibre clothing and closed leather shoes
About gas kilns
Our gas kilns are built for general studio firing. If you want to use one for raku firing, check the manufacturer’s guidance first, because not every kiln is designed to be opened while hot. A kiln such as the Bailey Studio Standard gas kiln is a fuel-fired example. Never modify a kiln or its gas supply unless the manufacturer says it is safe. Gas connections should be installed by a qualified professional.
9 Essential Tips for a Safe Raku Firing
Follow these before you light anything.
- Fire outdoors on a stable, non-flammable surface, well away from buildings, dry grass and trees.
- Wear natural fibres, not synthetics, because synthetic fabric can melt onto skin.
- Use long tongs and gloves, and keep your face and arms away from the open kiln.
- Put on eye protection and a respirator rated for fumes and smoke.
- Keep children and pets well away from the area.
- Place a fire extinguisher and a hose or water bucket within reach.
- Let a trained person guide you if this is your first time.
- Check the weather, and avoid windy or very dry conditions.
- Allow pieces to cool fully before touching them, as they stay hot longer than they look.
Smoke and fumes
Raku firing produces heavy smoke. Do not breathe it, and stay upwind. Do not fire in a garage, shed or enclosed space. Our guide to kiln ventilation explains why air movement matters even in routine firings, and the same concern applies much more strongly to reduction smoke.
A Typical Raku Firing Session Step by Step
Every studio runs a little differently, but a common sequence looks like this.
Before the fire
Set up the reduction bins with combustible material, fill your water bucket, and lay out your tongs and gloves. Load glazed, dry pieces into the kiln so they do not touch each other or the walls. Pieces that touch will fuse together as the glaze melts.
During the fire
Light the kiln according to the manual and heat it steadily. Raku firing is quick, and glazes are often ready in a short time compared with a normal glaze firing. Watch the glaze surface through the opening and look for a glossy, molten shine.
The removal
When the glaze looks ready, wearing full protection, lift the piece out with tongs and place it straight into the reduction bin. Cover the bin and leave it for the time your recipe suggests. Opening too early can cool the piece unevenly, and leaving it too long can dull the colours.
Cooling and cleaning
When the piece is cool enough to handle with bare hands, wash it with water and a soft brush to remove soot. Always wear a mask when scrubbing dry residue.
Preparing Pieces and Your Site for Raku Firing
Good results begin at the wheel or the work table. Design pieces with even walls, round corners and a base that is not much thicker than the sides. Avoid very thin rims and sharp inside angles, since these crack under thermal shock. Smaller, simpler shapes are a sensible choice for your first session.
Dry and bisque fully
Make sure every piece is completely dry before the bisque firing. Trapped moisture turns to steam and can burst a piece. If you are unsure, wait a few more days. A slow bisque fire gives a strong, safe starting point.
Plan the work area
Mark out a clear zone around the kiln and the reduction bins. Keep a straight path between them, free of hoses, chairs and loose items. Walking a few steps with a glowing pot is much safer when you have practised the route cold. Check local fire rules and any restrictions before you plan an outdoor session.
Have a helper
Raku firing goes better with two or three people. One person removes the piece, one handles the lid of the bin, and another watches the area and keeps people back. Agree on roles before you start.
Common Problems in Raku Firing
Most issues in raku firing come from rushing or poor preparation. Here is a quick guide.
| Problem | Likely cause |
|---|---|
| Pot cracks on removal | Clay not suited to thermal shock, or a thick wall |
| Glaze does not melt | Wrong glaze or too little time in the kiln |
| Pieces stick together | Glaze touched during loading |
| Dull surface | Pot left in reduction too long |
| No crackle | Glaze too thin or removed too soon |
Thermal shock
The most common failure is cracking from sudden temperature change. Make pieces with even wall thickness and use the right clay. Thick bases next to thin walls will almost always break.
Raku Firing and Other Alternative Methods
Raku firing is only one of several special firing methods. Salt firing, pit firing and reduction cooling each give very different surfaces. If you enjoy the effect of reactive surfaces, see our article on reactive glazes and our overview of salt glaze pottery.
For wider ceramics guidance and community resources, the National Council on Education for the Ceramic Arts is a helpful starting point. You can also read our pottery studio safety guide for advice on equipment.
Frequently Asked Questions About Raku Firing
Is raku firing safe for beginners?
It can be, if you prepare properly and ideally work with an experienced potter. Wear the right gear, fire outdoors and follow the manual for your kiln. If you are unsure, take a class before trying it alone.
Can I do raku firing in an electric kiln?
Opening an electric kiln while it is hot is usually unsafe and may damage it. Follow the manufacturer manual, and never open an electric kiln mid-firing unless the maker says you can. Most raku firing uses a kiln built for the job.
Is raku firing food safe?
Usually not. Many raku glazes are not food safe, and the crackled surface is porous. Keep raku pieces as decorative work unless you have confirmed a specific glaze is safe for use with food.
How long does raku firing take?
A raku firing is much shorter than a standard glaze firing, but the time depends on the kiln size, the fuel and the glaze. Follow your kiln manual and your glaze instructions rather than aiming for a fixed time.
Final Thoughts
Raku firing can give you surfaces that no other method matches, but it demands respect. Choose the right clay, use glazes made for the process, and follow every safety step. If you can, join a class or fire with an experienced potter before you try it alone.
When you are ready to equip your own studio, look through our kilns and kiln furniture or contact us and we will help you find equipment that suits your space and your firing style.
