Clay shrinkage is the reason a lid that fits perfectly when you make it can rattle loose after the firing. Every clay body gets smaller as it dries and again as it fires, and the amount varies from one body to the next. Once you understand clay shrinkage and measure it for your own clay, you can design pieces to come out at the size you intended.
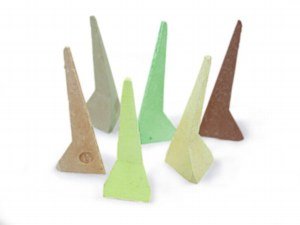
Table of Contents
Quick Answer
Clay shrinkage happens in two stages. Drying shrinkage occurs as water leaves the clay, and firing shrinkage occurs as particles fuse in the kiln. To find your number, roll a test tile, scratch a line of known length, dry and fire it, then measure again. Divide the loss by the original length and multiply by 100. Use that percentage to make pieces larger at the start so they finish at the right size.
Why Clay Shrinkage Happens
Wet clay is a mixture of clay particles and water. The water sits between the particles and holds them apart. As the clay dries, the water leaves and the particles move closer together. That is the first part of clay shrinkage, and it happens before the piece ever goes into a kiln.
In the kiln, a second change occurs. Heat drives off chemically bound water and then starts to fuse the particles. Higher temperatures bring further tightening, and the clay becomes denser and stronger. This is why a clay fired at a higher temperature usually shrinks more than the same clay fired lower.
Drying shrinkage
Drying shrinkage, the first stage of clay shrinkage, depends mostly on how much water the clay holds. A softer, wetter clay shrinks more than a stiff one. Fine-grained clays tend to shrink more than coarse, grogged bodies, because grog does not shrink and acts like a skeleton.
Firing shrinkage
Firing shrinkage, the second part of clay shrinkage, depends on the clay body and the temperature. Your supplier usually lists the expected shrinkage for each body at its recommended cone. Treat that figure as a guide and then confirm it yourself with a test, because your handling and firing can change the result.
7 Proven Ways to Measure Clay Shrinkage
You can measure clay shrinkage at home with a ruler and a test tile. Follow these steps to get a number you can trust.
- Roll a slab of your clay to a thickness you commonly use.
- Cut a rectangle roughly 15 cm long and smooth the surface.
- Scratch a straight line exactly 10 cm long with a needle tool and ruler.
- Let the tile dry slowly and flat, then measure the line again.
- Bisque fire the tile and measure the line a third time.
- Glaze fire the tile if you plan to glaze your work, and measure once more.
- Calculate the percentages from your measurements.
The formula
Clay shrinkage as a percentage equals the original length minus the final length, divided by the original length, times 100. As an example of the arithmetic, if a 100 mm line ends up 88 mm long, the shrinkage is 12 percent. Your own clay will give its own number.
Why a bigger tile helps
A longer line gives a more accurate result because small measuring errors matter less. Many potters scratch a 10 cm line and measure with a ruler marked in millimetres. Record the clay type, wetness and firing temperature so you can compare later.
Planning Your Designs Around Clay Shrinkage
Once you know your clay shrinkage, you can work backwards. To get a finished size, divide the size you want by one minus the shrinkage. For a 12 percent loss, a piece that should end up 100 mm wide should start about 114 mm wide. This works the same for height, width and wall depth.
Lids and fittings
Lids, caps and stoppers need extra care. If both the lid and the pot are made from the same clay at a similar dryness, they shrink together and the fit usually survives. If they differ in wetness, a lid may shrink more or less than the pot. To keep clay shrinkage matched, make fitted pieces at the same time and from the same batch where possible.
Handles and joins
Handles attached when the pot is too dry crack away because the two parts shrink at different rates. Join pieces at a similar firmness and dry them slowly together. Our guide to attaching pottery handles covers timing and technique.
What Changes Clay Shrinkage
Several factors push clay shrinkage up or down. The most important are these.
| Factor | Effect on shrinkage |
|---|---|
| Water content | Wetter clay shrinks more as it dries |
| Particle size | Finer clay usually shrinks more than coarse clay |
| Grog or sand | More grog usually reduces shrinkage |
| Firing temperature | Higher firing generally increases shrinkage |
| Recycled clay | Can differ from fresh clay, so retest |
| Thickness | Thick areas dry more slowly and unevenly |
Reclaimed clay
Clay that you have reclaimed and re-mixed may hold a different amount of water and a slightly changed particle mix. Always test clay shrinkage on a batch of reclaim if you rely on exact dimensions. Our guide to reclaiming pottery clay at home shows how to prepare it consistently.
Mixing clay bodies
Blending two clays gives a shrinkage somewhere between the two, but not always in a straight line. If you mix bodies, run a new test tile for the blend.
Clay Shrinkage, Warping and Cracking
Uneven clay shrinkage is the root of many problems. If one part of a pot dries faster than another, the faster part contracts and pulls on the rest. The result is warping or a crack. Thick bases next to thin walls, a wet handle on a dry pot, and a draught across one side of a piece are common causes.
Dry pieces slowly and evenly, cover thick areas, and turn plates over as they firm. A damp box or a pottery drying cabinet gives you control. Our post on why pottery cracks lists more fixes.
Flat ware and kiln shelves
Plates and tiles shrink across the shelf during firing. If they stick to rough shelves or kiln wash, they can crack as they pull. A smooth, well-kiln-washed shelf, or a thin layer of alumina on the shelf, helps pieces slide. Read our article on kiln wash for application tips.
Clay Shrinkage and Your Kiln
Clay shrinkage also affects how you load the kiln. Bone-dry greenware has already finished its drying shrinkage but not its firing shrinkage, so it is close to the largest size the piece will ever be in the kiln. Measure greenware, not the finished pot, when you plan a load.
Firing temperature and speed also change the final result. Your cones show how much heat the clay actually received, which makes them a better guide than the controller alone. Learn more in our article on pyrometric cones, and see the Orton self-supporting cone in our range. Orton also publishes helpful reference material at Orton Ceramic.
For wiring, installation and firing procedures, always follow the kiln manufacturer manual, and have a licensed electrician handle any electrical work.
Clay Shrinkage in Large and Tall Pieces
Big work magnifies every small percentage. A platter planned at 40 cm will lose several centimetres by the end of the firing, and a tall vase loses height as well as width. If you build large pieces, test a bigger tile or a small trial pot rather than relying on a small bar.
Allow for clay shrinkage in the kiln
Check that the finished size, not just the starting size, suits your kiln. Measure the interior of your kiln and the clearance between shelves before you design big work. Our guide to kiln shelf spacing shows how to plan the gaps between levels.
Slow drying for big forms
Large forms hold a lot of water, and the outside dries before the inside. Cover them loosely, turn them, and give them extra time. Clay shrinkage that is allowed to happen slowly causes fewer cracks than shrinkage forced by a draught or heat.
Practical Tips to Control Clay Shrinkage
Keep a small log of your clay shrinkage tests. Write down the clay, the water content, the cone and the result of each test. Over time you will have a record that predicts the outcome for new work.
- Wedge clay thoroughly so it has an even moisture level throughout the batch
- Weigh clay for repeat items such as mugs, so each one starts with the same mass
- Keep test tiles from the same clay batch as your pots
- Use the same bisque and glaze firing schedule each time
- Measure at the same stages every time
- Note the room humidity during drying
Frequently Asked Questions About Clay Shrinkage
How much is normal clay shrinkage?
It varies by clay body and firing temperature. Check the data sheet from your clay supplier for the expected range, and then confirm it with your own test tile.
Does clay shrinkage happen in the bisque or the glaze firing?
Both, but most of the change happens by the end of the first firing. Further clay shrinkage during the glaze firing depends on how high the temperature goes compared with the bisque.
Can I stop clay shrinkage?
No, but you can control it. Choose a body with grog, keep the water content consistent, and measure a test tile. Treat clay shrinkage as a known number and design around it. Write the percentage on your test tile before you file it away, so you can find it again next season.
Do glazes shrink too?
Glazes contract as they cool, and a glaze that does not fit its clay can craze or shiver. This is a separate issue from the clay’s own change in size, but it is a good reason to test glaze and clay together.
Final Thoughts
Clay shrinkage is not a flaw, it is a property you can measure and plan for. A simple test tile, a calculator and a notebook are enough to make your work more predictable. With a known percentage, lids fit, sets match and large pieces come out at the size you drew.
If you need kiln shelves, cones or a kiln that fits your finished work, browse our kiln furniture or contact us and we will help you plan.
