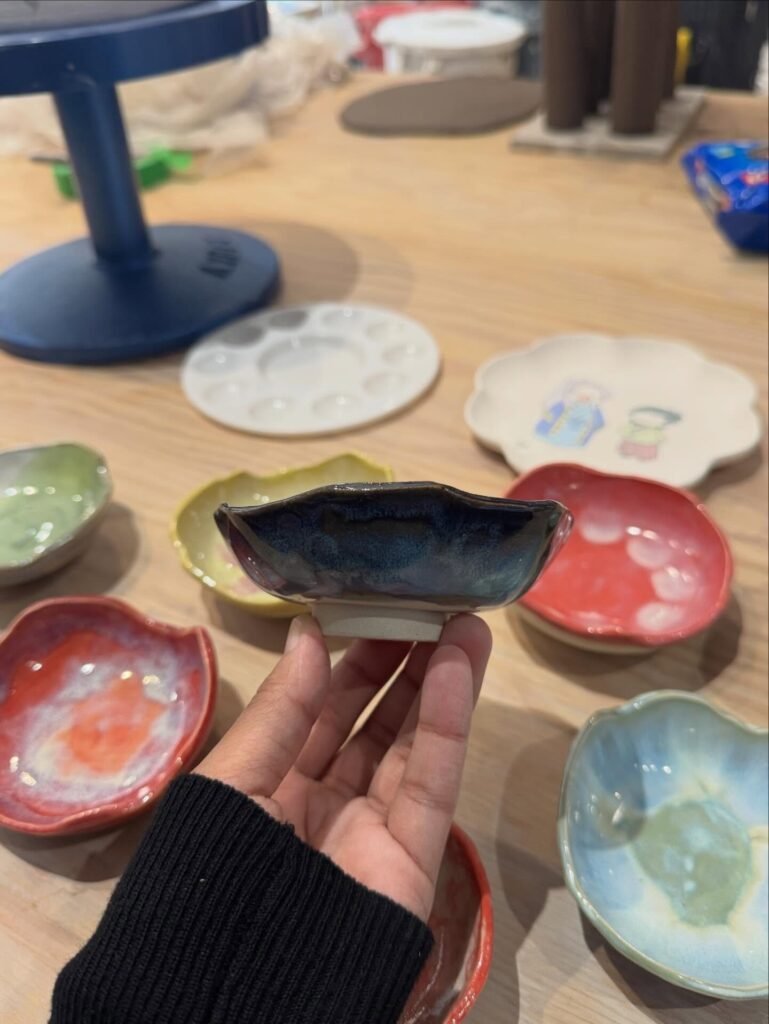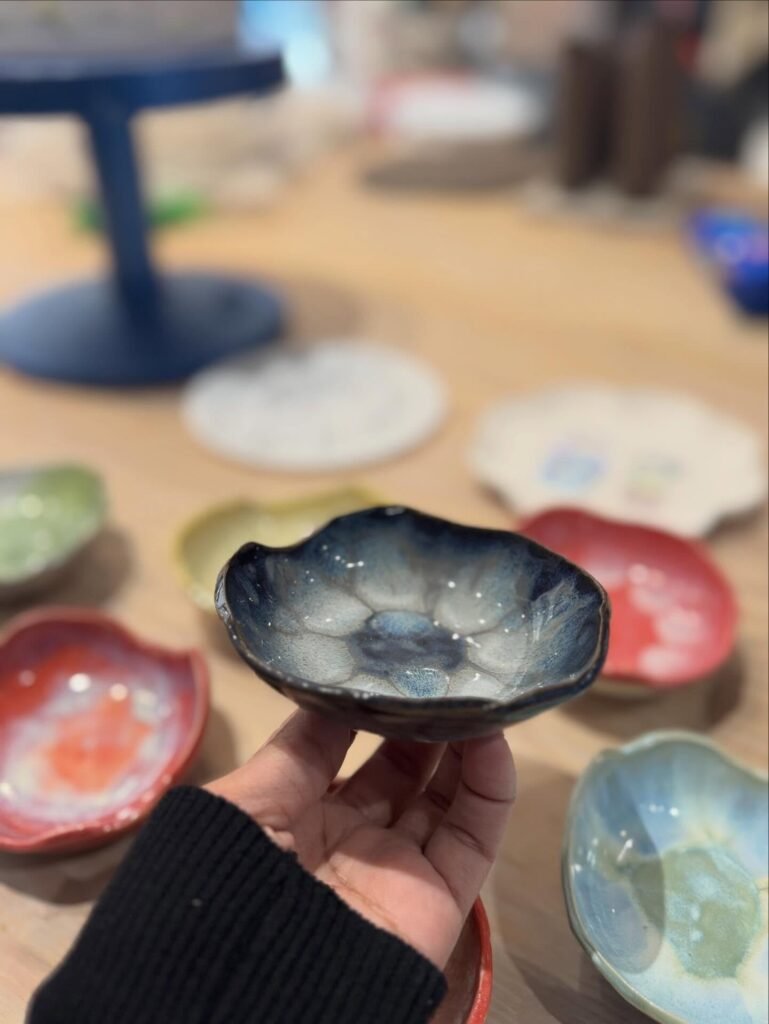
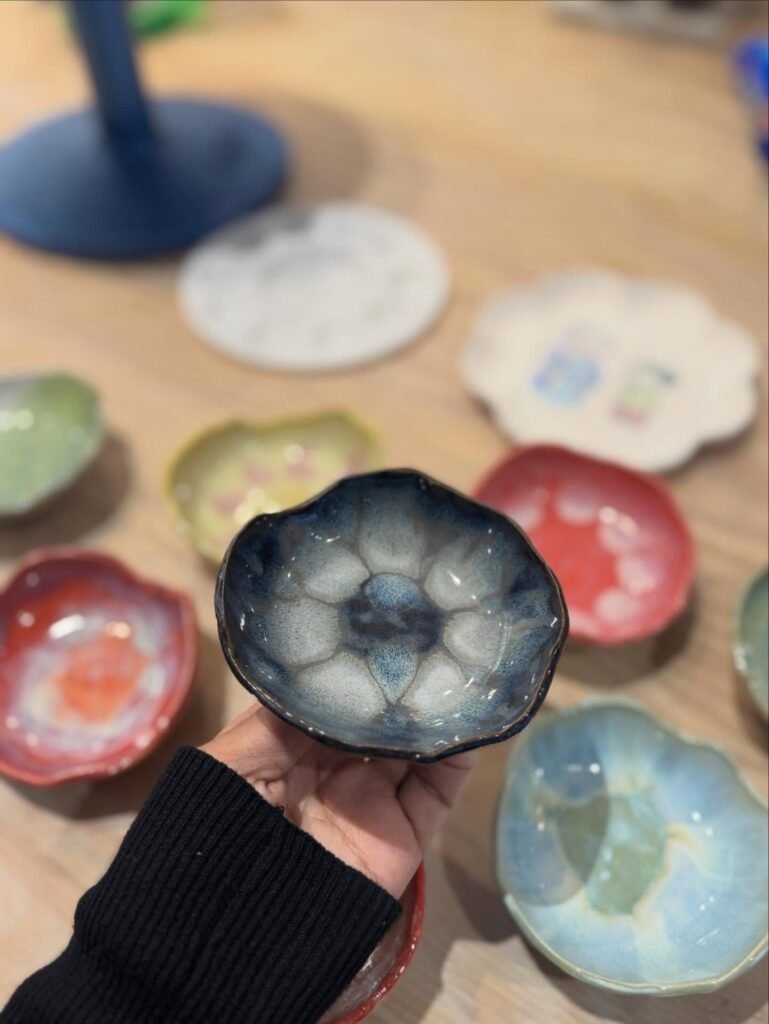
Reactive glazes are popular because they create variation instead of a perfectly uniform surface. During firing, they can produce flowing colors, pooling, speckling, breaking and other effects that make each ceramic piece look slightly different.
That unpredictability is a big part of their appeal.
In 2026, ceramic design is increasingly moving toward earthy colors, organic forms and surfaces that show more of the handmade process. Reactive glazes fit naturally into that direction. Current ceramic trend coverage identifies reactive glazes, natural colors and organic shapes among the year’s notable pottery influences. (Töpferkunst)
However, getting a good reactive glaze result is not simply a matter of brushing it onto a pot and putting the piece in the kiln.
The clay body, application thickness, surface texture, firing temperature and kiln conditions can all affect the final surface.
What Are Reactive Glazes?
Reactive glazes are ceramic glazes designed to produce visible changes during firing.
Instead of leaving one flat, consistent color, a reactive glaze may develop several tones or patterns across the same piece. For example, one area might appear lighter while another becomes darker or more concentrated.
The glaze may also pool in recessed areas, break over raised texture or create subtle color transitions.
As a result, a simple bowl can develop a surprisingly complex surface.
The important thing to understand is that variation is usually part of the intended result.
A reactive glaze that looks uneven after firing is not necessarily defective. In many cases, that unevenness is exactly what makes the glaze interesting.
Why Are Reactive Glazes Trending?
The popularity of reactive glazes connects with a broader shift in contemporary pottery.
Instead of aiming for perfectly smooth and identical surfaces, many potters are embracing visible texture, natural color variation and irregular forms.
Likewise, earthy shades such as brown, cream, green, blue and terracotta work especially well with this aesthetic. Current 2026 ceramic trend coverage describes the movement as a shift away from smooth perfection toward more natural and artisanal surfaces. (Töpferkunst)
Meanwhile, the September/October 2026 issue of Pottery Making Illustrated is devoted to developing unique ceramic surfaces. Its features include terra sigillata, marbling, layering and other approaches to surface development. (Default)
Therefore, reactive glazes are part of a much larger interest in making ceramic surfaces more individual.
How Do Reactive Glazes Work?
Several factors determine how a reactive glaze behaves.
Glaze chemistry
First, the ingredients in the glaze influence how it melts and interacts during firing.
Different materials can encourage color changes, crystals, speckles or movement across the surface.
Consequently, two glazes that look relatively similar before firing can produce very different results.
Glaze thickness
Next, application thickness matters.
A thin layer can produce a lighter or more transparent effect. Meanwhile, a thicker application may become darker, richer or more fluid.
For that reason, you should avoid assuming that one coat will produce the same result as three coats.
Surface texture
Texture also changes how the glaze behaves.
Raised areas can cause the glaze to become thinner or break. Conversely, recessed areas can collect more glaze.
As a result, carving, ribs, impressed textures and other surface treatments can make reactive effects much more visible.
What Temperature Are Reactive Glazes Fired At?
There is no single firing temperature for all reactive glazes.
Some are designed for low-fire pottery, while others are formulated for mid-fire or high-fire ceramics.
Cone 6 is a particularly common range for stoneware pottery, but you should never assume that a reactive glaze is suitable for Cone 6 simply because another glaze is.
Instead, check the manufacturer’s firing instructions.
You also need to make sure that your clay body is compatible with that temperature.
The Kiln Depot’s existing guide to Cone 6 and Cone 10 ceramics explains how firing temperature affects clay bodies, glaze development and finished ceramic work. (The Kiln Depot)
Why Glaze Thickness Matters So Much
If you’re new to reactive glazes, this is one of the easiest variables to overlook.
You might apply a glaze evenly and expect the entire piece to develop the same color.
However, reactive glazes often respond strongly to thickness.
A heavier application around the bottom of a vessel, for instance, can create a darker or more concentrated area. Similarly, a thinner application around the rim may produce a lighter effect.
Therefore, don’t treat uneven results as an immediate failure.
Instead, ask whether the glaze thickness created an effect you can use intentionally.
Texture Can Make Reactive Glazes More Interesting
Reactive glazes and textured pottery often work extremely well together.
A carved line gives the glaze somewhere to collect.
A raised ridge gives it an opportunity to break.
A textured handbuilt surface can create dozens of small changes in thickness.
As a result, the glaze can emphasize details that might otherwise be difficult to see.
You can experiment with:
- Carving
- Sgraffito
- Ribbed surfaces
- Impressed textures
- Handbuilt marks
- Incised lines
- Deliberately uneven forms
However, keep the first experiments simple.
If you change the clay, glaze, texture and firing schedule simultaneously, you will not know which variable caused the result.
Test Reactive Glazes Before Using Them on Finished Work
Testing is probably the most useful habit you can develop with reactive glazes.
Before glazing an important vessel, make several small test tiles using the same clay body.
Then change one variable at a time.
For example, try a thin application on one tile and a heavier application on another. Next, compare a smooth tile with a textured tile.
Afterward, fire the tests using the glaze manufacturer’s recommended schedule.
Record what you did.
Write down the number of coats, clay body, firing temperature and any special firing instructions.
Over time, those test tiles become a personal glaze reference library.
More importantly, they help you reproduce successful results instead of relying entirely on luck.
Does the Kiln Affect Reactive Glaze Results?
Yes.
The kiln provides the heatwork that allows the glaze to mature, so firing conditions matter.
Temperature, firing speed, hold times and kiln loading can all influence the final result.
Therefore, consistent kiln operation becomes especially valuable when you’re testing glazes.
If you change the glaze application but keep the firing schedule consistent, you can learn what the glaze itself is doing.
On the other hand, if both the glaze and firing schedule change every time, troubleshooting becomes much harder.
The Kiln Depot’s guide to how long a full kiln firing cycle takes explains why firing time varies and why the cooling stage also matters. (The Kiln Depot)
Do You Need an Expensive Kiln?
Not necessarily.
What matters most is having a kiln that can safely and consistently reach the firing range required by your clay and glaze.
Your production volume also matters.
A small hobby studio may have very different requirements from a potter producing hundreds of pieces each month.
Likewise, your available electrical service and physical studio space can limit which kiln models make sense.
The Kiln Depot’s kiln size guide covers the relationship between firing volume, piece size and kiln capacity. (The Kiln Depot)
How to Start Experimenting With Reactive Glazes
If you’re ready to try them, start small.
First, choose one glaze with clear manufacturer firing instructions.
Next, use a familiar clay body.
Then make several test tiles.
Apply different glaze thicknesses and, if appropriate, experiment with texture.
Afterward, fire everything using the recommended schedule.
Once the kiln has cooled completely, compare the results.
Most importantly, keep your notes.
You may discover that the best result comes from an application that looked almost too thin before firing. Alternatively, you may find that a textured surface produces much stronger color variation.
That information is far more useful than simply knowing that a particular glaze is “good.”
The Appeal Is the Variation
Reactive glazes are not about making every pot look identical.
Instead, they give potters a way to work with variation intentionally.
The clay provides the form.
The surface provides texture.
The glaze introduces movement.
Finally, the kiln transforms all of those variables into the finished surface.
That is why reactive glazing fits so well with the current interest in individual, tactile ceramics.
If you want to explore the technique, don’t try to eliminate every surprise.
Learn which surprises you can reproduce.
Frequently Asked Questions
What is a reactive glaze?
A reactive glaze is formulated to produce visible variation during firing, such as color movement, pooling, breaking, speckling or other surface effects.
Are reactive glazes good for beginners?
Yes. However, beginners should test them first because application thickness, clay compatibility and firing conditions can significantly affect the result.
Do reactive glazes only work at Cone 6?
No. Reactive glazes are available for different firing ranges. Always follow the manufacturer’s recommended temperature.
Why does my reactive glaze look different in different areas?
Variation can result from glaze thickness, surface texture, kiln placement and firing conditions. In many cases, that variation is intentional.
Can I use reactive glazes on textured pottery?
Yes. In fact, texture can make reactive effects more visible because glaze can collect in recessed areas and break across raised surfaces.
How can I get more consistent results?
Use the same clay body, application method and firing schedule while testing. Also, record the number of coats and firing conditions for each test.
Final Thoughts
Reactive glazes offer something that perfectly uniform finishes cannot: individuality.
Because the final surface depends on clay, glaze, application and firing, each piece can develop its own character.
So, rather than starting with an entire kiln load, begin with a handful of test tiles.
Experiment with thickness.
Try texture.
Keep your firing conditions consistent.
Then use what you learn to develop a surface that feels like your own.
That approach fits the wider 2026 movement toward distinctive ceramic surfaces while giving you a practical way to turn experimentation into repeatable technique. (Default)